bodywork

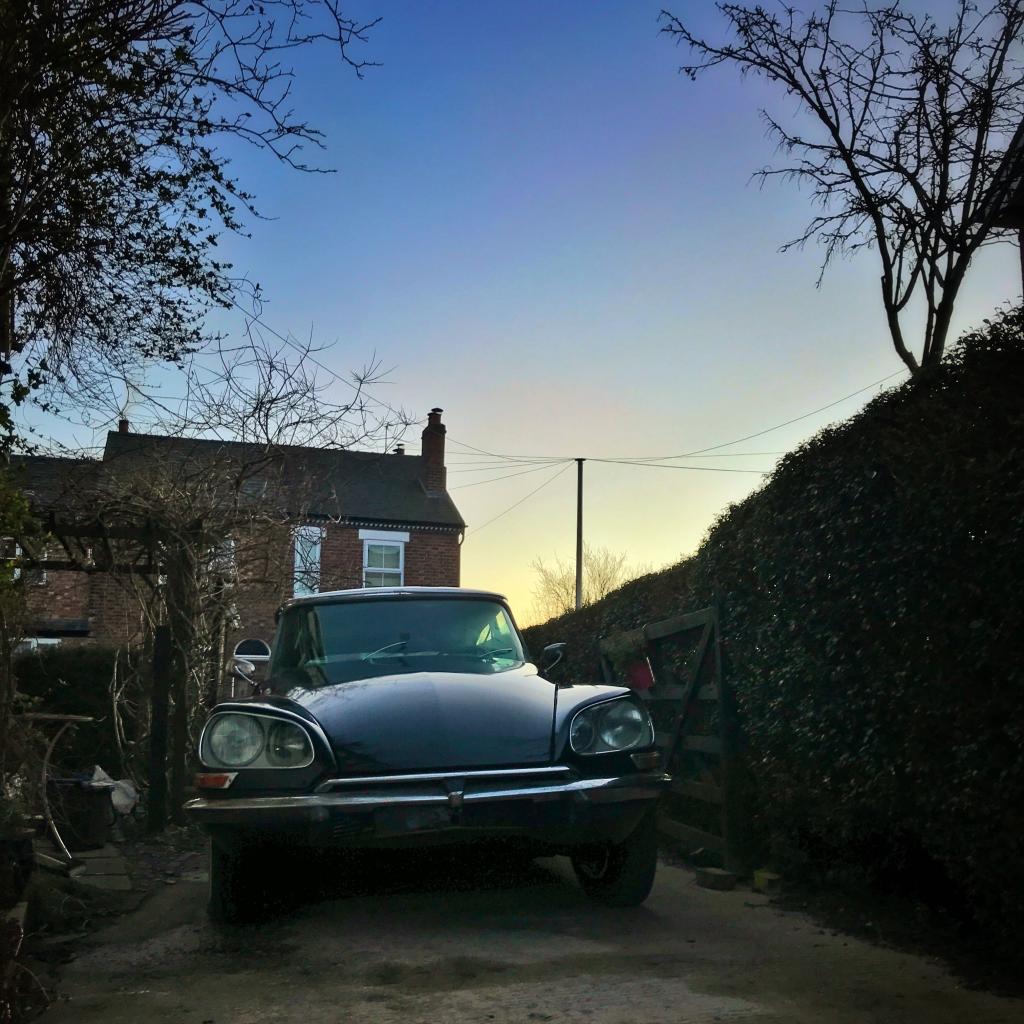
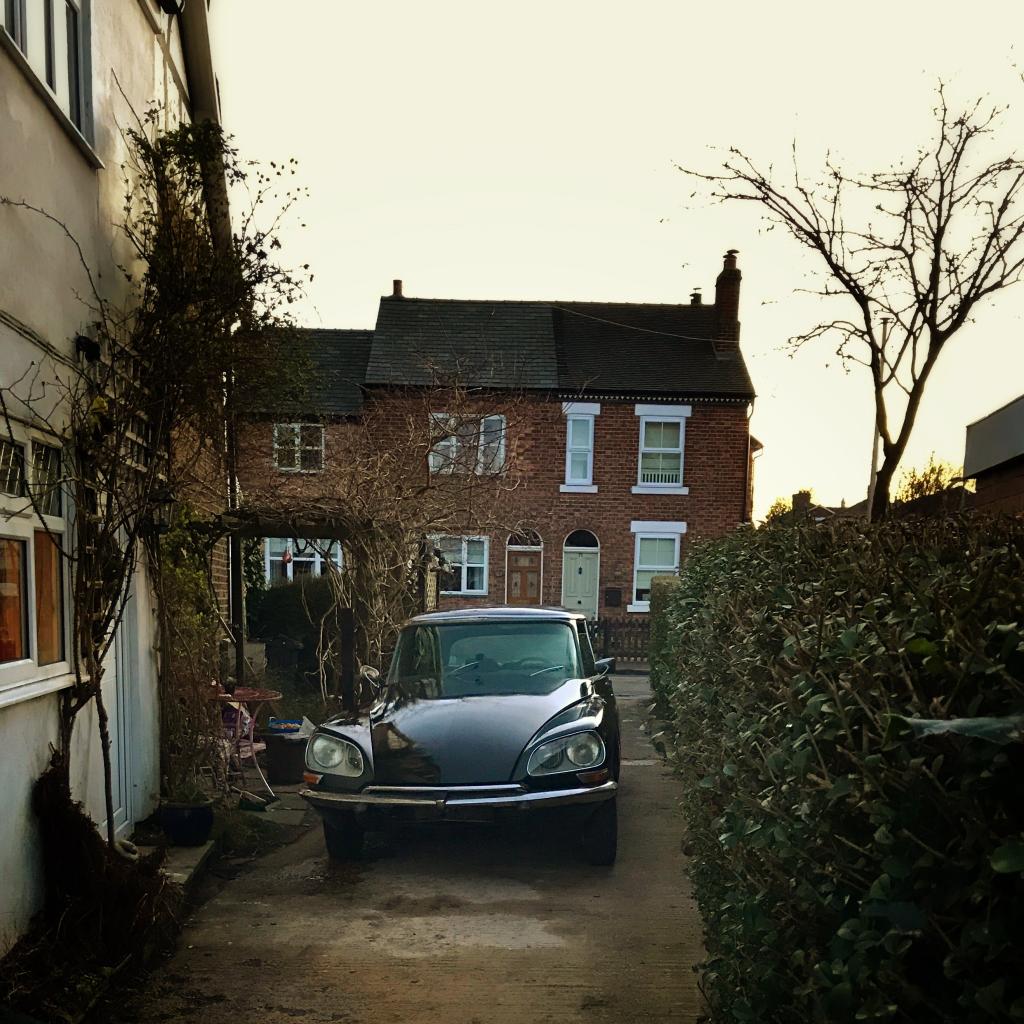
The DS and I on our first big trip, a 1000 mile journey to our new home in Bavaria.
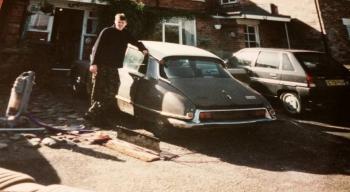
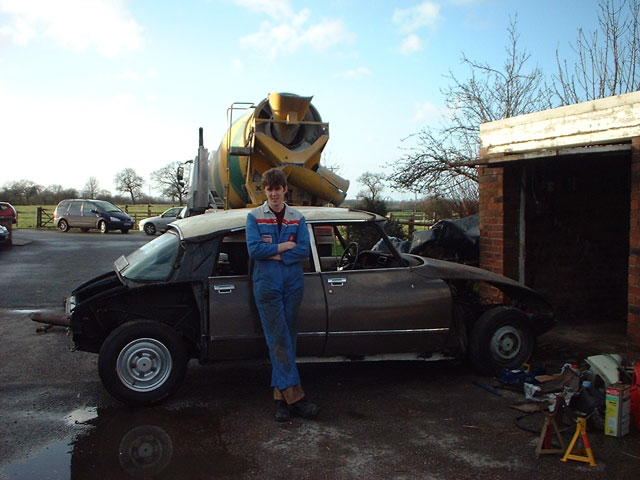
Here is me back in October 2000, having just bought the car. One of us looks a lot older today and one a lot younger!
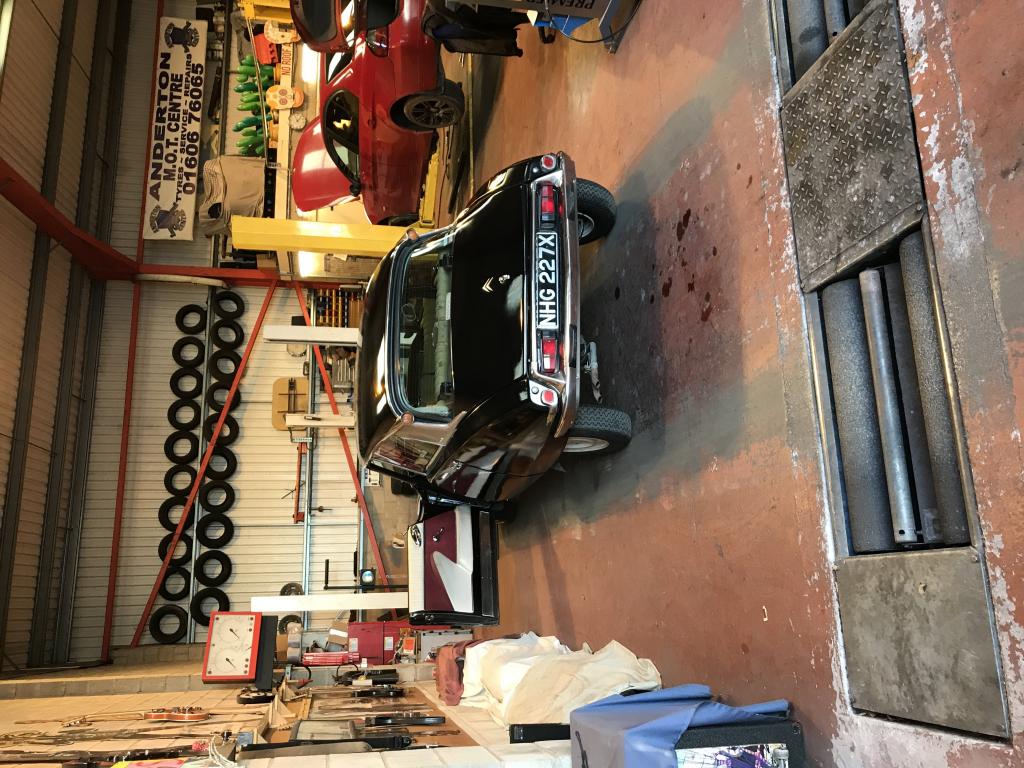
In March 2018 she passed her first MOT in 20 years first time.

In March 2018 she passed her first MOT in 20 years first time.

In February 2018 the car was finally complete and driving. Many many small jobs remained at this point!

In February 2018 the car was finally complete and driving. Many many small jobs remained at this point!
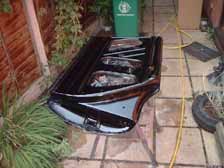
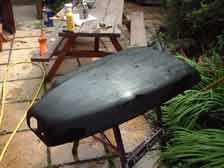
After many weeks of hard work sanding and painting, finally the whole car was black in February 2018. Just polishing left to do.

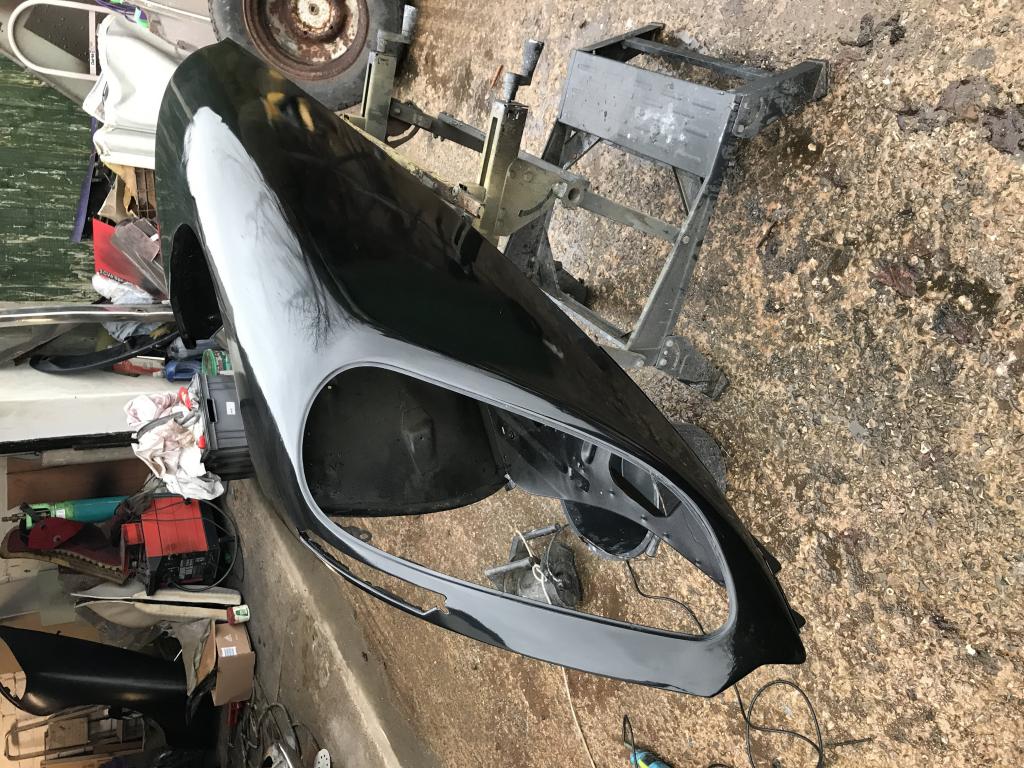
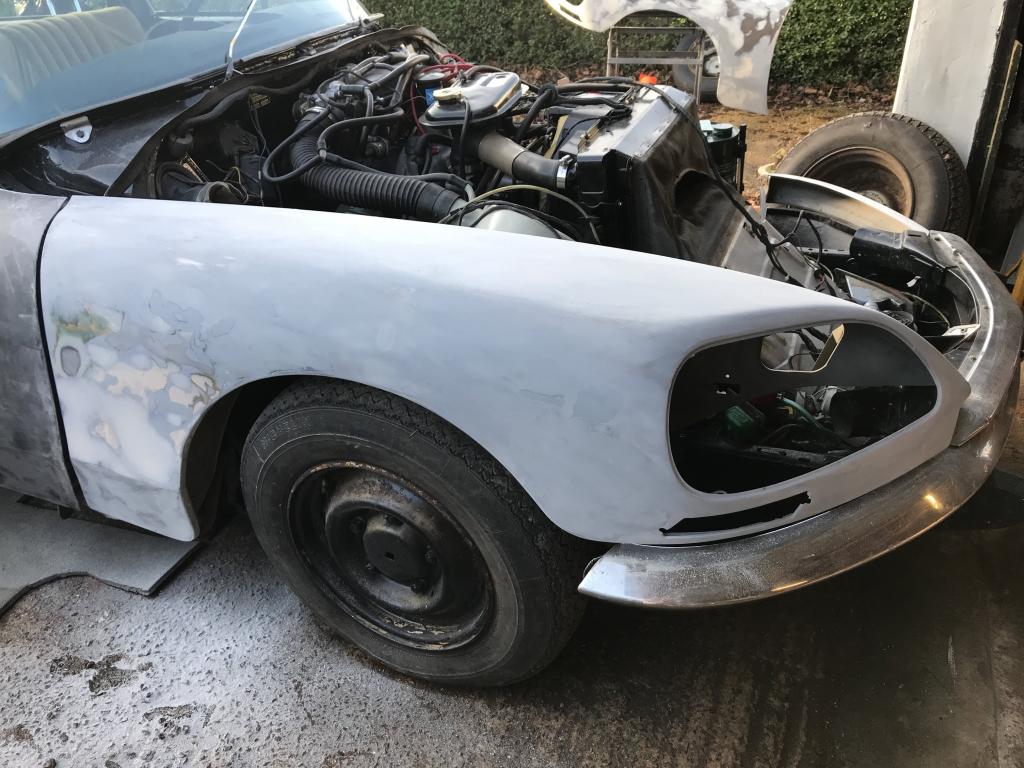
Painting a front wing

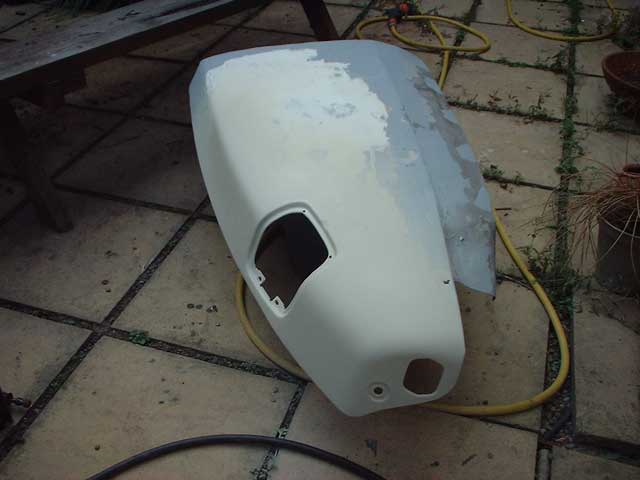
Because I wasnt planning on stripping the car down to bare metal, I used a coat of bar coat on the entire body prior to painting. This is supposed to stop any reaction with the lower coats of paint, and it did seem to work.
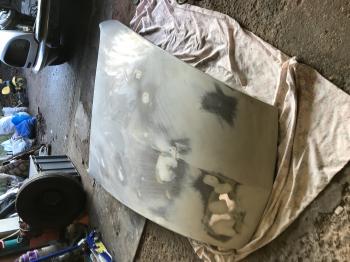
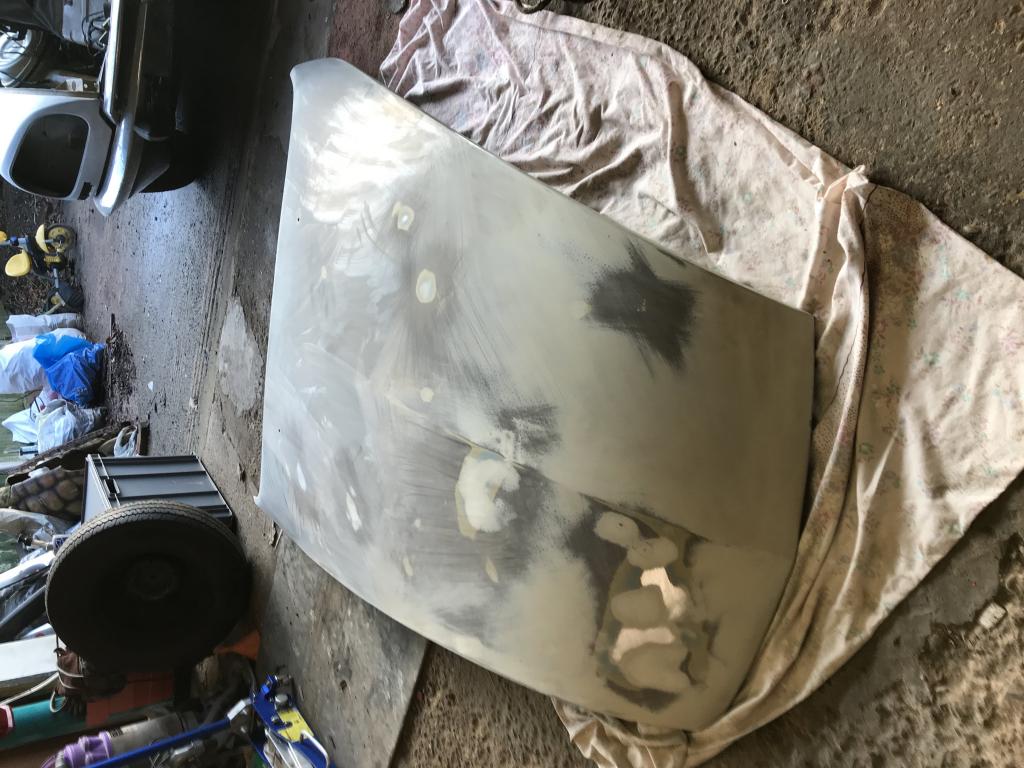
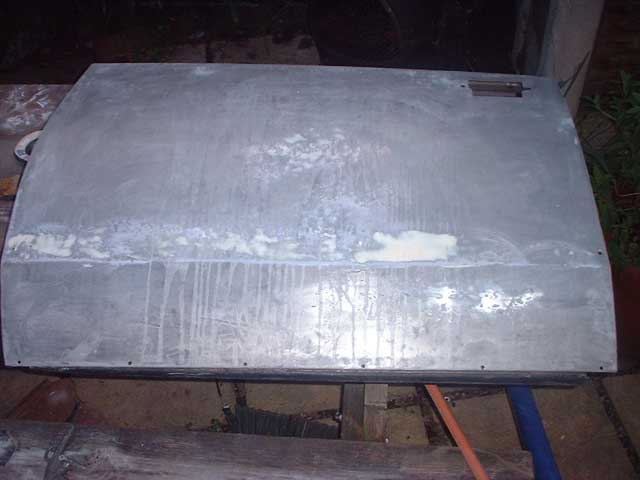
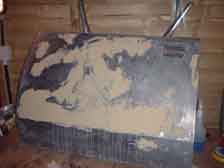
Preparing the bonnet for paint

Test fitting panels to get the gaps right and make sure it would all bolt back together after painting
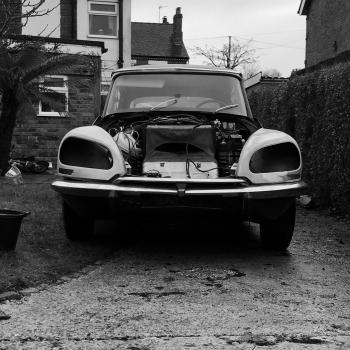
Starting to build the car back up
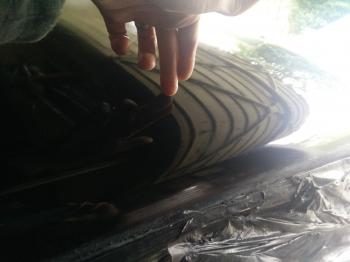
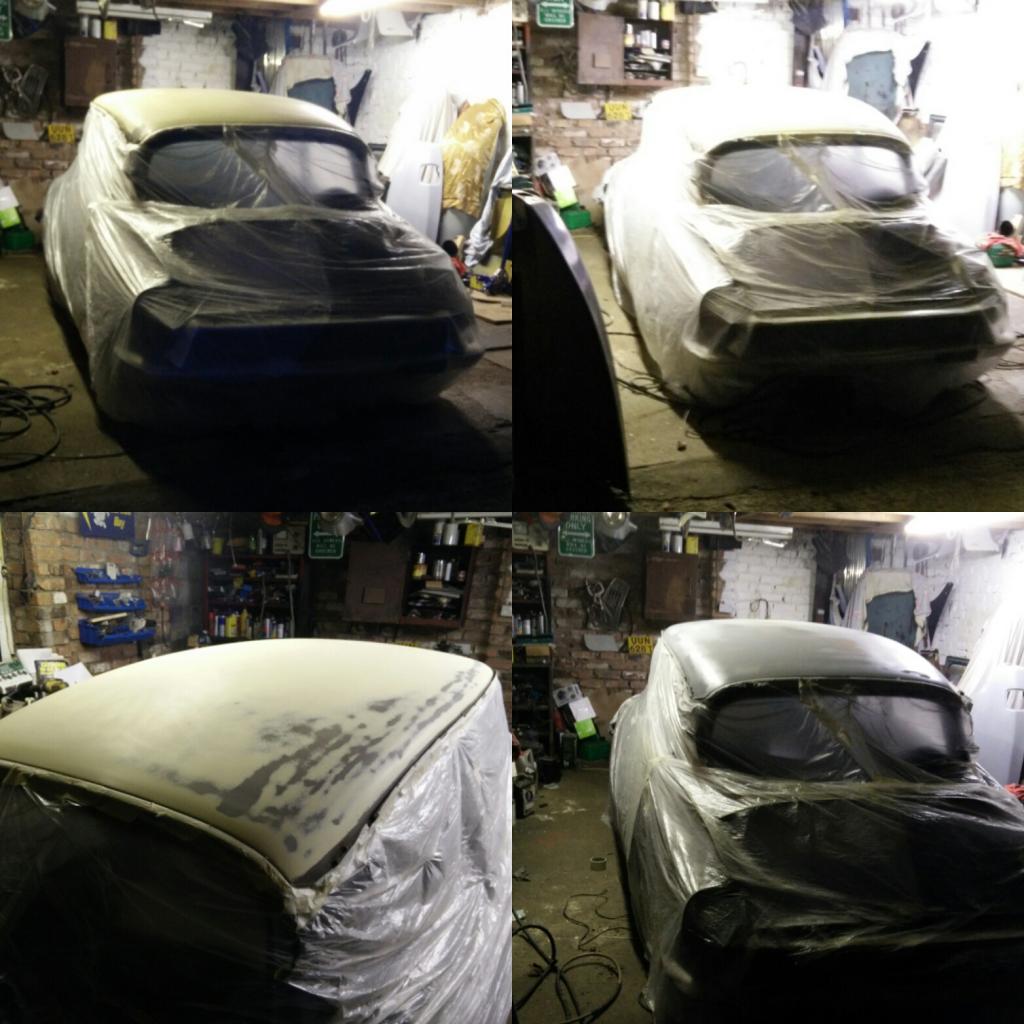
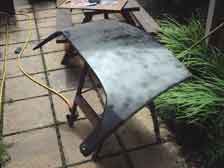
Trying to show the reflection of the paint on the roof
After painting I wet sanded the paint and then polished it. Here you can see I have sanded the whole roof and started to polish it
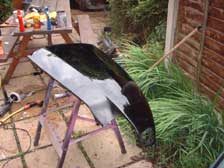
Painting the roof in September 2017

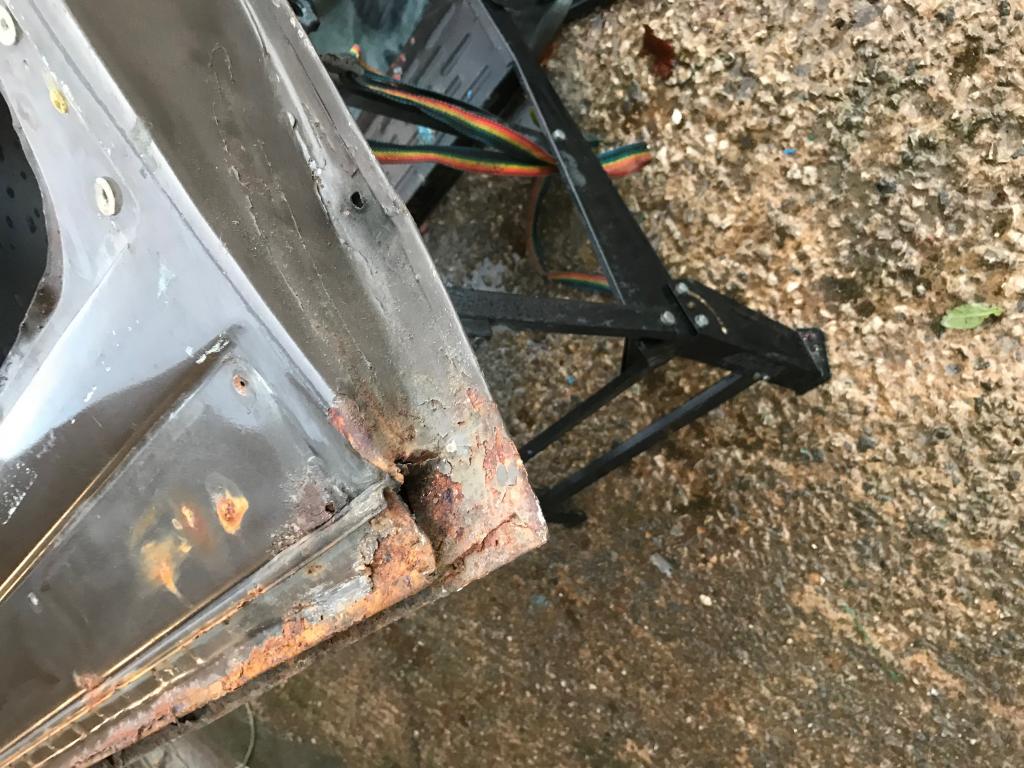
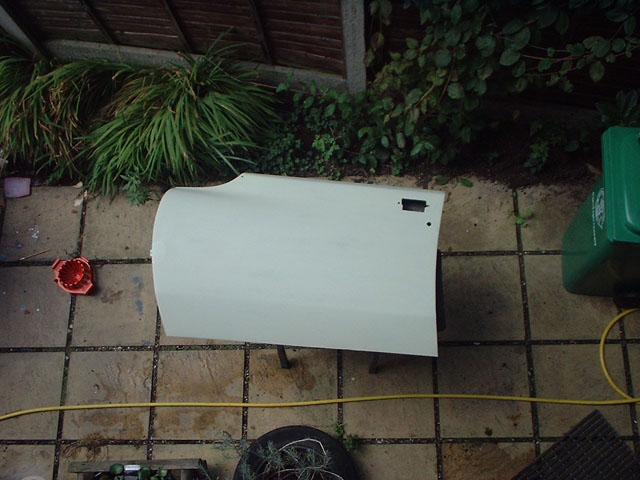
I replaced the entire lower section as well as the door skin on this front right hand door
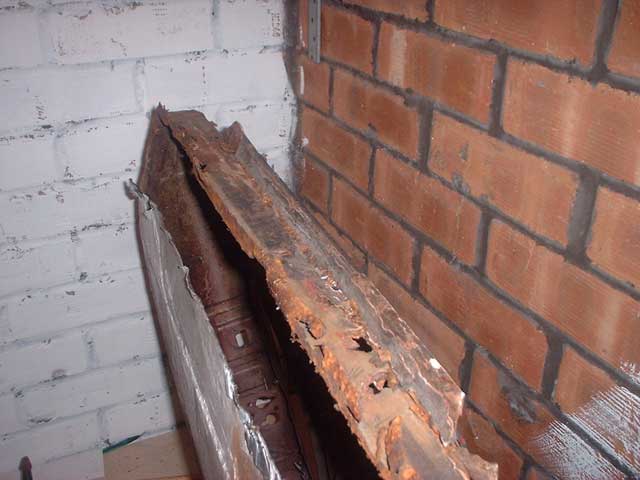
The bottom of this door was completely rusted out and needed completely replacing
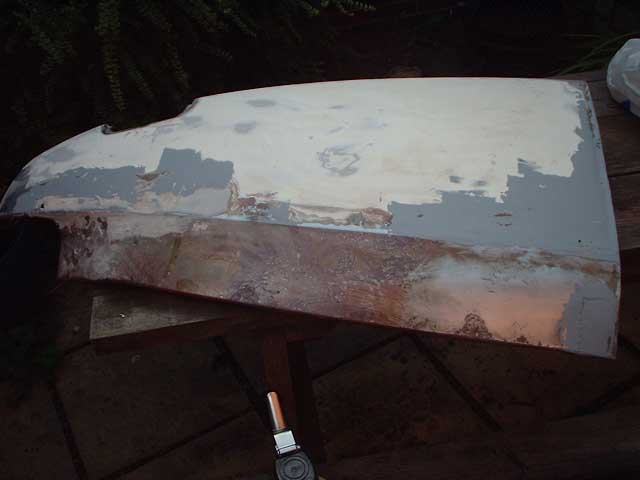
After all of the steel repairs, I filled, primed and then used Dolphin Glaze to get the surface level.

Making more repairs to the bottom of the front wings
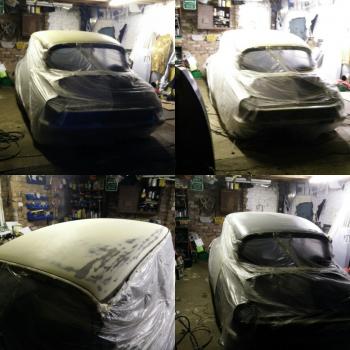
Priming the roof late into the night in September 2017
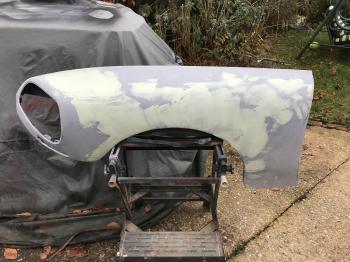
Here you can see that I've applied high build filler primer to the rear half of the wing. Next I need to flat the filler I've applied to the other half and then primer the entire wing. Once that's done I'll flat the filler-primer, apply another coat, flat that then begin filling the tiny imperfections with Stopper. Hopefully I should get all of that done this week, then it will be ready for colour!
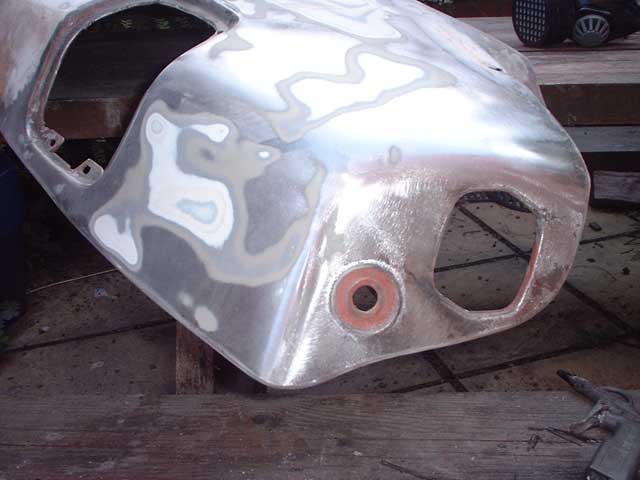
I began stripping the old paint down to a level where I was happy with the underlying metal and feathering the edges of the old paint. I used the air powered DA sander to get the entire panel looking like this.
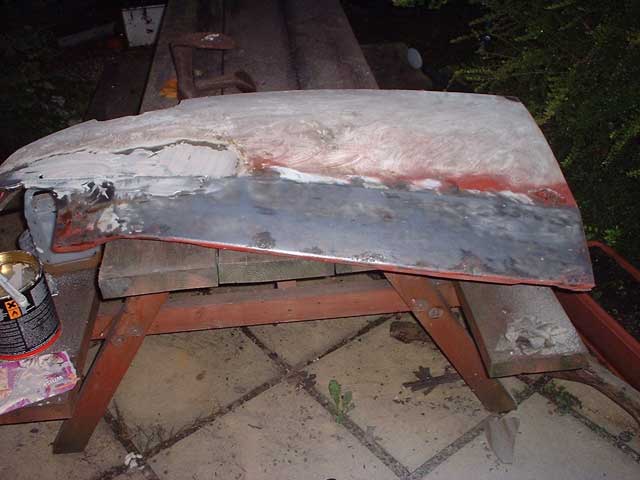
Well after a very hectic year I've re-commenced work on the DS. I thought I'd better get this rear wing finished whilst the weatherwas good - as you can see it needs a fair bit of work. I've already let new metal in in numerous places, including replacing the entire end closing panel as detailed further up this page.
After fitting all of the trim to the door I wrapped it in foam, then fitted it to the car. It's important to have the window wound down when you first fit the door to the car, otherwise when you slam the door shut you are likely to smash the glass as it requires careful adjustment!

My replacement front door came from a non-Pallas car and hence didn't have the holes required to fit the Pallas trims. I used the hole cutter on my Dremel to carefully drill new holes in the inner side of the door to fit the Pallas kick-plates. After drilling the holes they were carefully rustproofed with Waxoyl and the Pallas trim was fitted.
I also fitted the window at this stage, as well as the locks and outer handle. I can't fit the inner handle until I have decided on which trim to use for the top half of the door (white or black leather). The window went in suprisingly easily; the window is gripped at the bottom by a metal claw/grip, this needs to be spread and the window fitted inside it. The easiest way to do this is by using the handle of a hammer as a lever. The window guides then need their spring clips refitting and the stop screws fitting.
The rubber seal at the bottom of the door was full of rusty old metal from the old panel, and covered in muck. 30 minutes in some soapy water cleaned it up, I then refinished it with some rubber dressing spray normally used on horse riding boots.
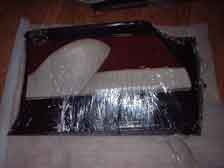
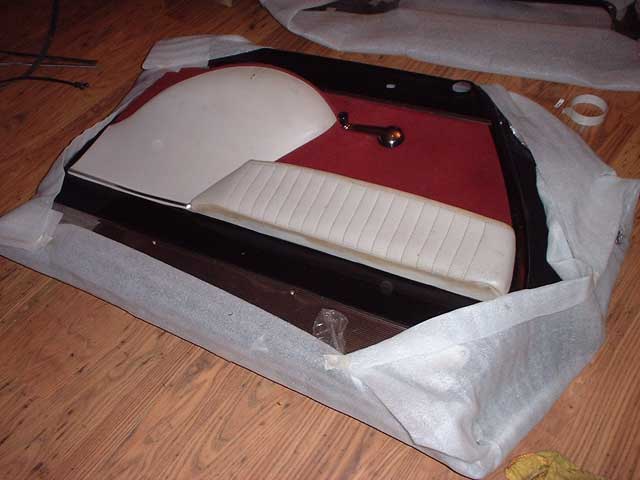
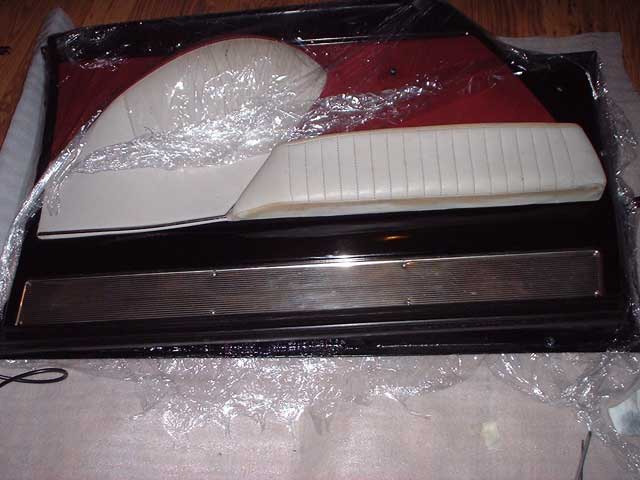
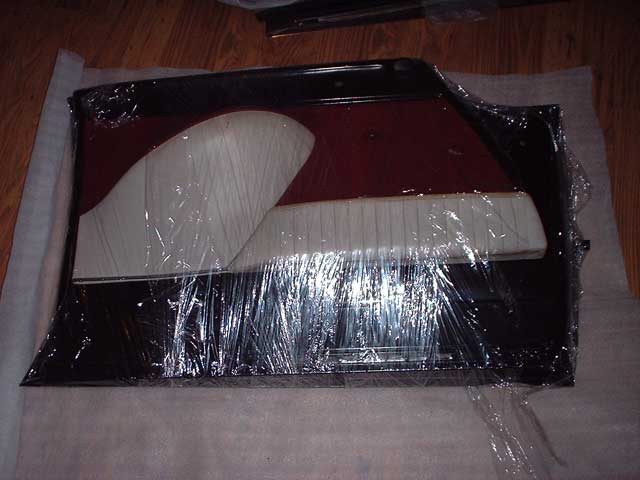
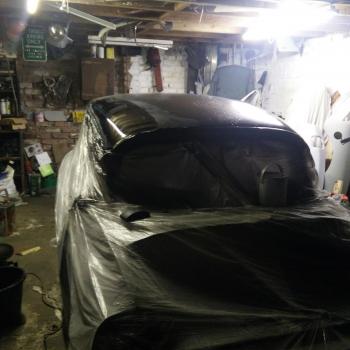
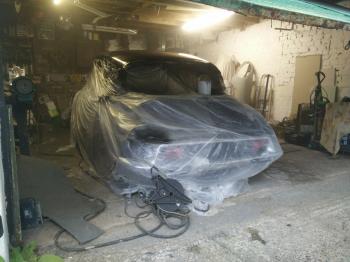
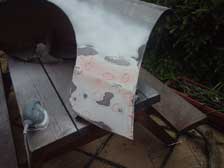
I had wrapped my painted panels in cling film to protect them, today was the day to refit the trims.
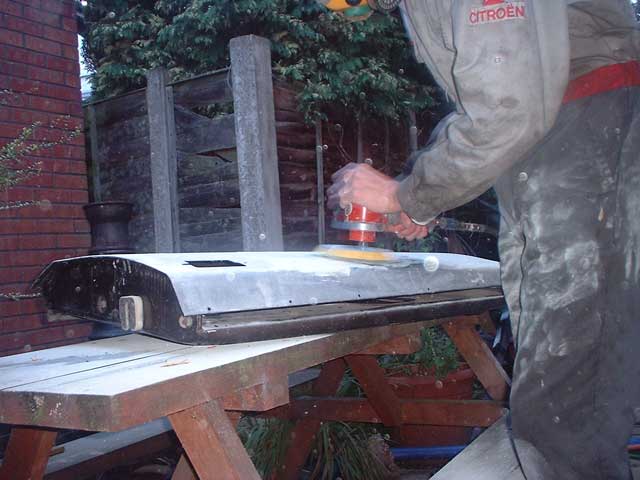
Here I am sanding the filler back using the DA Air Sander which makes short work of this tedious task. It's October 2004 now and I'm busy applying the numerous coats of filler required to level the surface of this door. Hopefully it will be ready for painting later this week.
Time for the next pass of filler. If you think taking a DS panel back to bare metal means less filling - think again! DS panels often left the factory with filler on them and this one needs a fair amount of work to get it smooth. Also I made the mistake of being too aggressive with the sanding disc which has left marks on the surface :-(

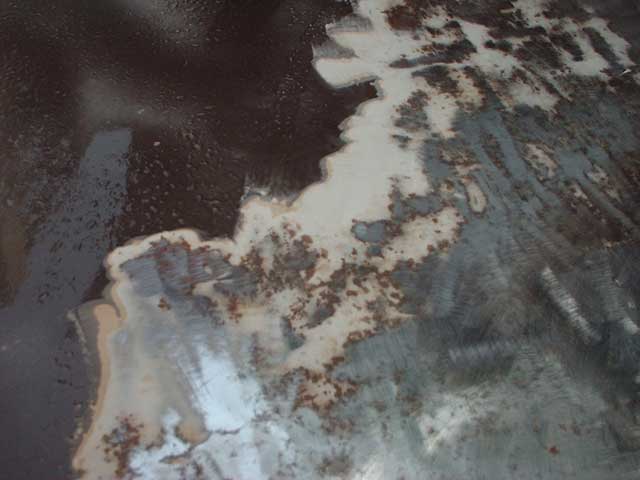
I applied copies amounts of Metal Ready over a period of about 12 hours and this appears to have converted all of the rust. I worked it into any tiny pits to ensure that it converted all of the rust, not just the surface layer.
You can see here how the metal ready has left a zinc coating on the panel which helps to prevent future rust. I've applied the first pass of filler in this shot as well.
Here you can see that I've removed the paint from the door. I'm not overly concered by the rust, since it is in it's early stages and has not damaged the door too much. I will treat this rust with POR15 Metal Ready which will solve this small problem and zinc/etch prime the surface in doing so.
I took a chance when buying this rear door; the skin was covered in small bubbles. I examined the rest of the door and it appeared rust-free so I chanced that the bubbles were down to sun damage or paint condition.
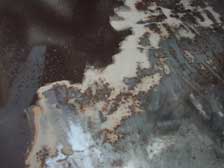
Unfortunately I was wrong! The previous painter of the door ahd painted directly over the rust, which was now bubbling through. Here you can see what I saw as I stripped the old paint.

Here is the same panel after the first bit of polishing. I've polished the area closest to you, the flat area behind that has cutting compound on it and the next area is untouched.
Once the whole panel has been polished I'll go over it with a couple of good coats of wax to protect the finish.
Here is the panel after I'd applied all of the top coats. Notice that the finish isn't great; that's because my DeVilbiss spray gun was playing up so I switched to my cheap gun. I only did this as I'd planned on cutting the paint back anyway so the finish out of the gun wasn't so important. Next step is to flat the paint with 1200 grade wet and dry and then polish it up with cutting compound and polish.

I wanted to show here how thin the first coat of paint should be. In actual fact I've probably put too much paint on on this particular panel. It should be very, very light. It's just enough to key onto the primer, then you can start building up your paint in lots more thin coats. Notice that I've put more paint on the edges of the panel and around any holes; I always do these areas first as I find it helps to minimise runs.
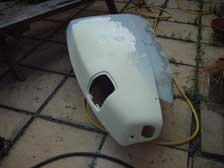
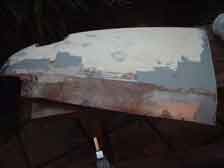
Here is the Valence after 3 or 4 coats of high-build primer-filler.
After flatting this and checking for any imperfections (by means of a guide coat) the panel is ready for painting.
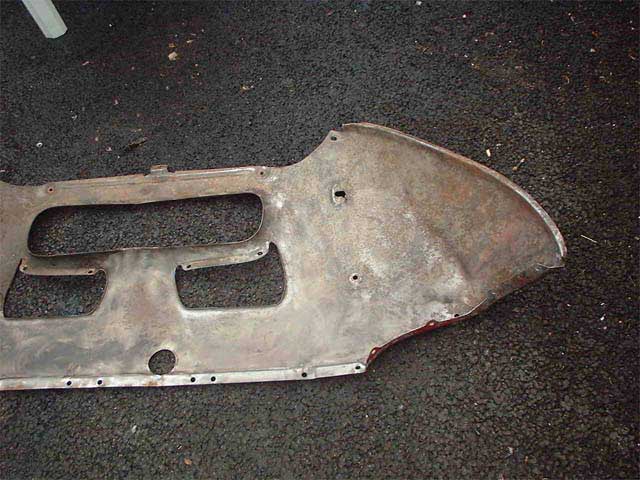
This valence isn't going to meet concours standards, but it's the best I could find. In fact it's the only one I could find! I also have a fibreglass valence in the workshop, I bought this from Gerd Schneider at Citromobile but it requires some substantial fettling to get it to fit perfectly so it's just being stored until I decide that I can no longer live with the steel valence.
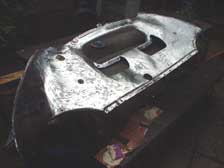
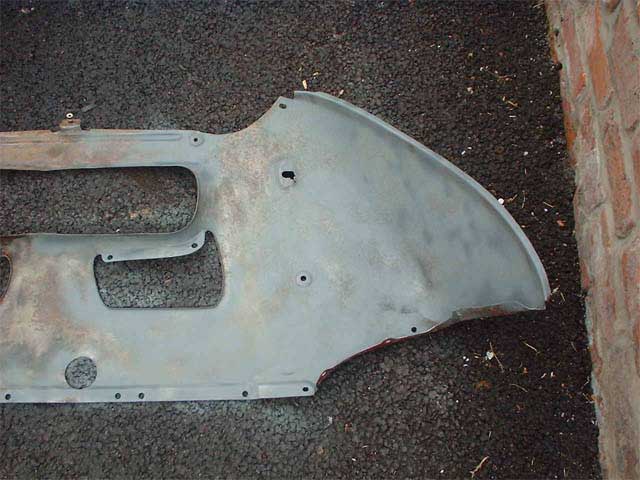
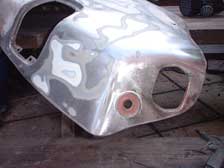
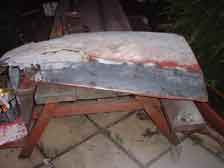
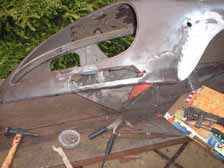
August 2004 - The front valence has been taken back to bare metal and is ready for primer. Despite looking sound it needed substantial repairs to one side, I let in about a square foot of metal! It has been filled and sanded, the next step is filler-primer and then the gloss coats.
A lot of people ask how long it takes me to get to this stage with a panel. I started this valence at 10am today, at which stage it was covered in 2 different colours of paint and a thick layer of waxoyl. By about 2pm I'd fabricated and welded in the repair sections and by 5pm I'd filled the imperfections (which took 3 passes of filler), sanded the filler and stripped the entire panel back to bare metal using a sanding disc. I had an hour for lunch so that's 6 hours solid work to get to this stage. I'd reckon on another 10-20 hours to get the panel finished...
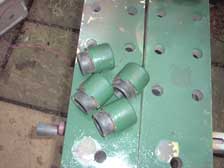
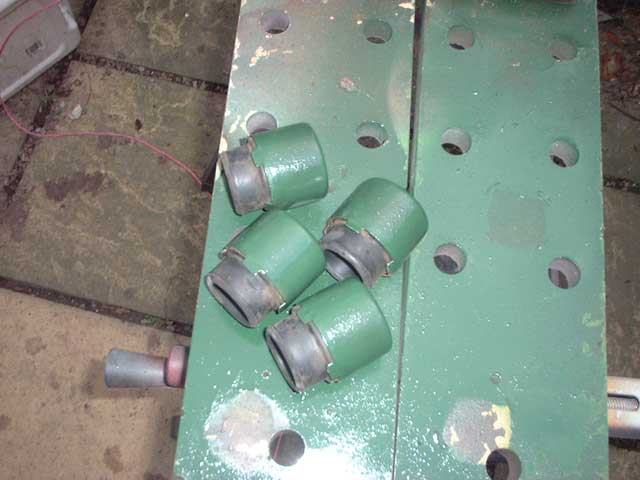
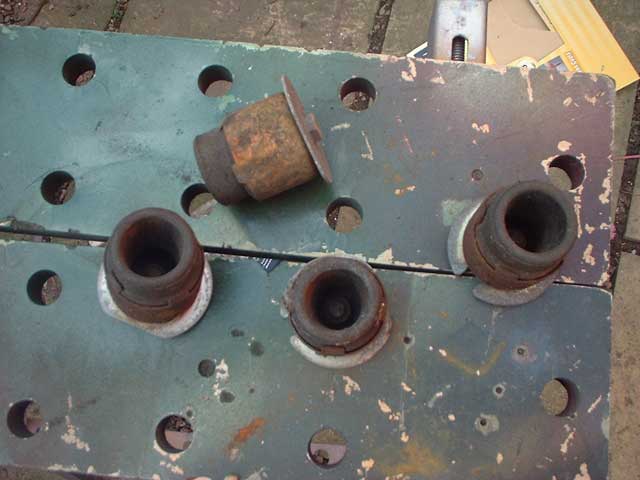
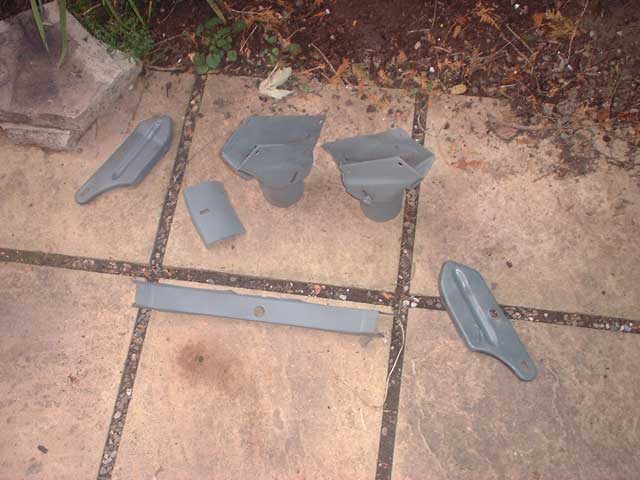
I cleaned all of the internal components and gave the casings a quick spray of paint.
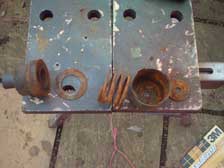
You can't see them but I thought I'd strip and rebuild them anyway. This is what's inside: the rubber mounting, a large washer, a spring and a smaller washer.
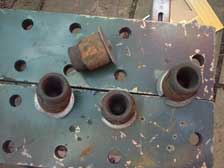
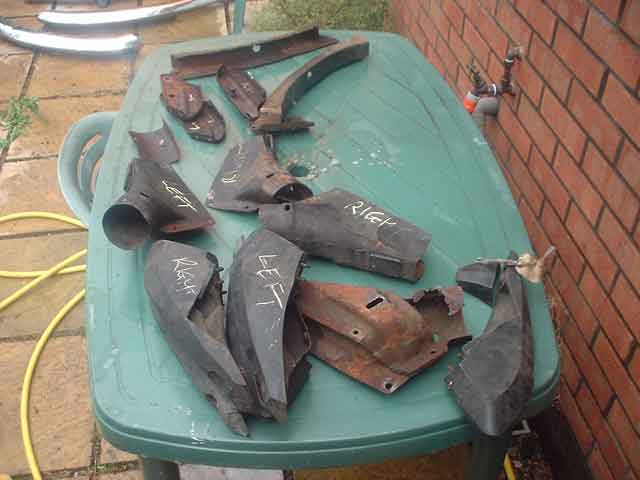
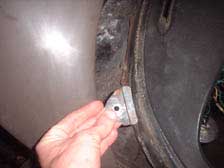
These are the rear mounting for the front wings. There are two each side where the wing connects to the A-pillar.

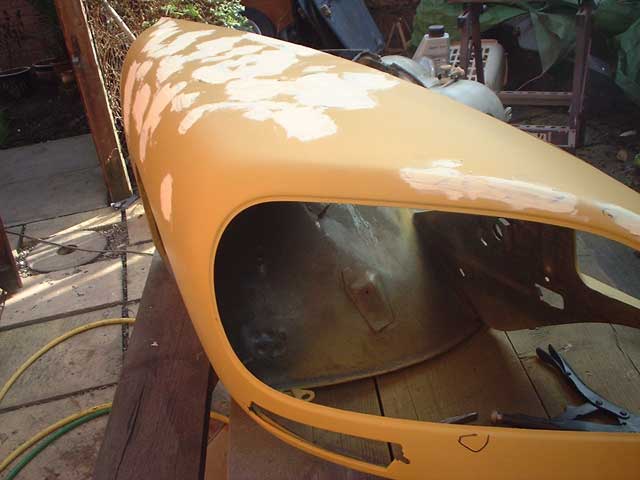
And here you can see I've skimmed the defects with filler. Once this is hard I'll sand it all away and then prime it again.

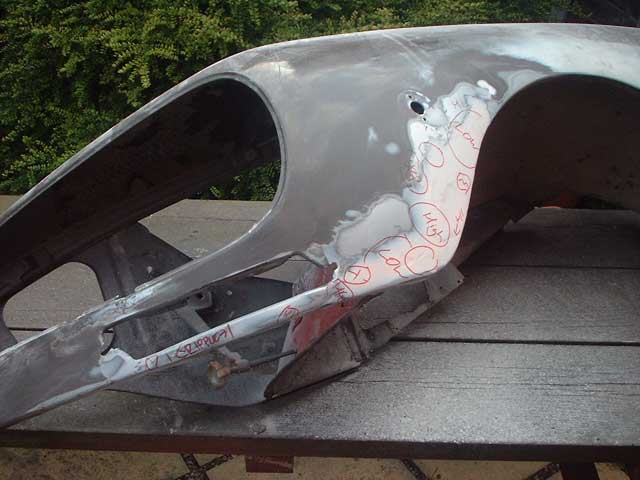
Here I've marked all those little areas that need attention just as I did on the previous wing.
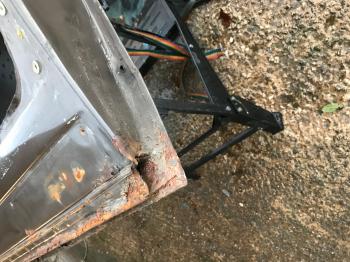
... it's a good job I did! This captive nut was missing and the surrounding metal was bent which would have meant surgery after painting. Good job I checked as I was able to replace the nut and straighten the metal now.

It's always worth loose building panels before painting them just in case anything is wrong with the fit of trim etc.

This front wing has just had it's first coat of primer having been taken back completely to bare metal. After stripping it I sealed the seams using seam sealer before painting.
Stripping a front wing is a time consuming business, with lots of little details to remember so I've created a special feature on stripping one.
Click here to access it!

No pictures today I'm afraid, but I thought I'd write a quick update to show I'm not lazing around this Winter!
I've been spending a lot of time on the front left wing; on close inspection it turned out to need much more welding than I'd first thought. This month I've welded in sections all around the wheelarch, replaced a number of sections of the inner wheelarch including the entire lower section and welded in two sections beneath the headlight aperture.
All these sections were fabricated by hand, other than the two beneath the headlight aperture. For these I cut sections from an old wing I had (far beyond repair!) and used these as repair sections. This was important because the aperture has a flange in it for the headlight trim which would be very tricky to accurately fabricate.
I've also taken the step of welding shut the hole for the Italian side repeater; my other (replacement) wing did not have this hole so rather than cutting it up I welded the old one shut. The wing is now down to bare metal and is currently having it's imperfections filled prior to painting...
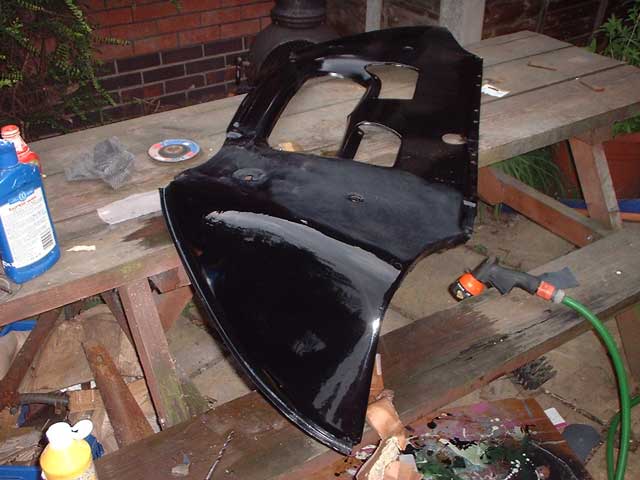
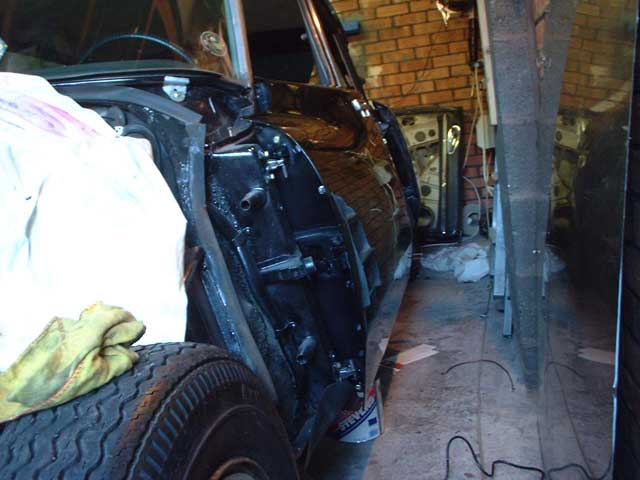
Here is the finished drivers door fitted to the car. It looks quite shiny doesn't it? Unfortunately the finish whilst shiny, has too many imperfections for me to be happy. In places the paint has sunk into cracks I filled with stopper. For this reason I'll probably have to take the door back to bare metal and start again!
Before painting the front of the door, I painted the back. If I'd done the front first there would have been too much risk of damaging the new paint whilst doing the back. Before priming the door, I took the opportunity to replace all of the seam sealer, which after 30 years wasn't sealing as well as it should! I also painted the bottom with POR15, inside and out.

After much sanding, I gave the drivers door it's first few coats of primer-filler. Next I'll sand this down and use stopper to get it flat before applying the colour coats.
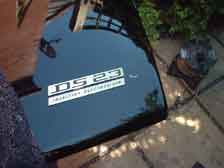
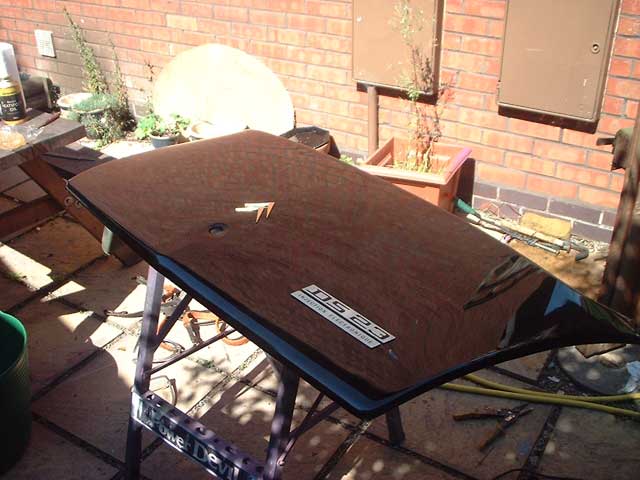
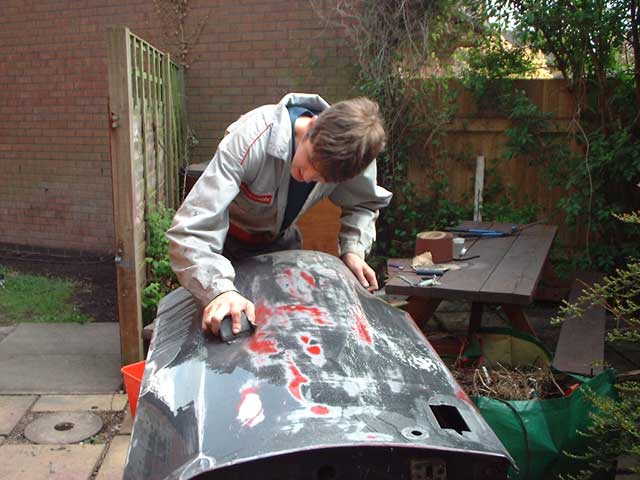
Disaster! Whilst sticking the DS23 badge back on, I dripped a little bit of super-glue onto the bootlid. When I wiped it off using a damp cloth it took the paint completely off, back to bare metal!!
I'll now have to re-prepare and spray this small area, then blend the paint into the old paint and polish it back up....

And here is the finished bootlid. After applying 8 coats of gloss black, I cut the paint back using 1200grit wet and dry, followed by a rub down with Farecla G3, then T-cut and polish to get the shine back.
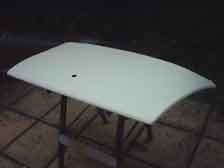
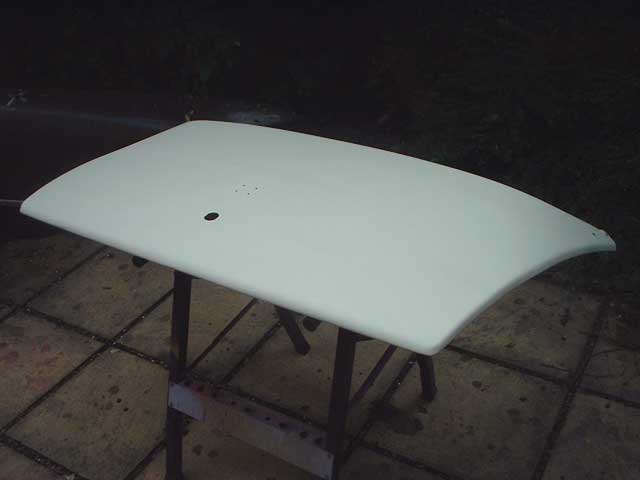
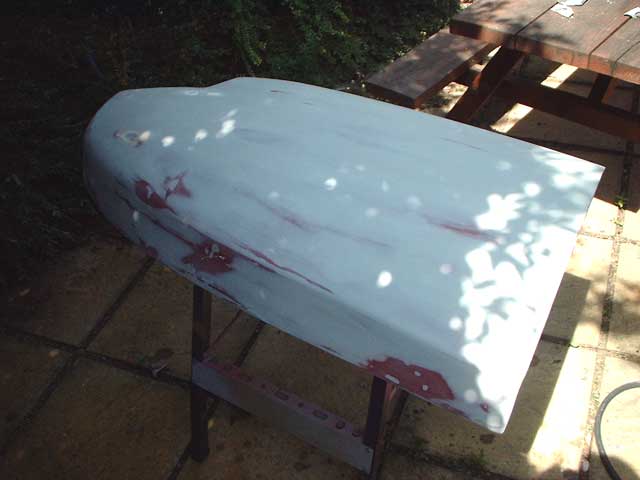
After flatting the bootlid, I applied a couple of coats of high build primer. Next I'll sand this back and use more more stopper as required before applying the top coat.
And here is the same panel after sanding the stopper back. You can see that the only stopper left are the tiny bits in the imperfections. Any more would show through the paint.

Here I've applied the first "pass" of stopper to get rid of any tiny imperfections.
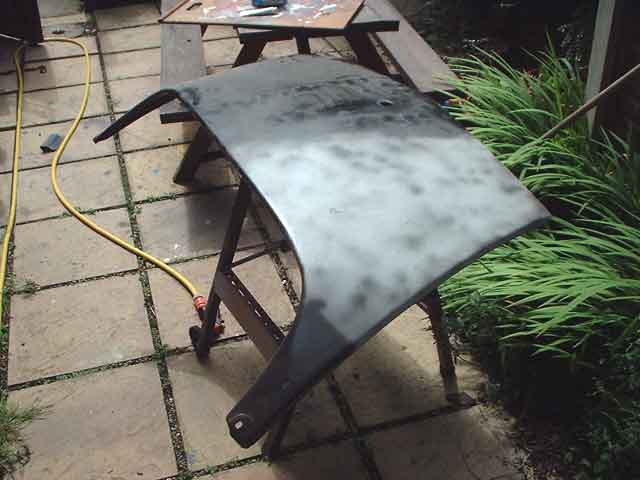
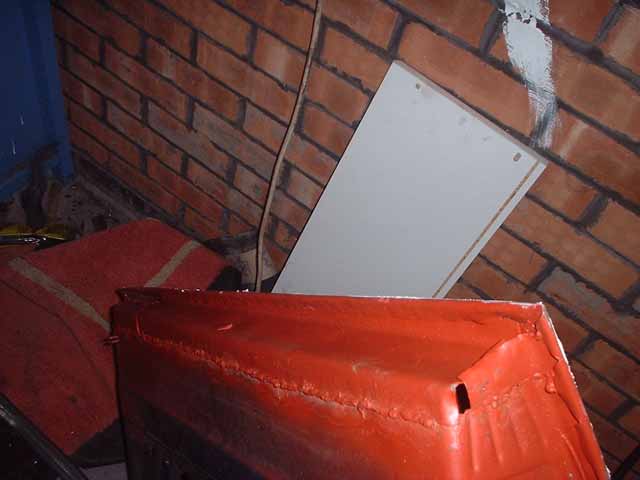
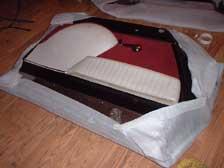
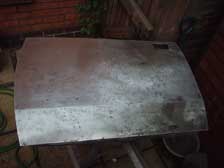
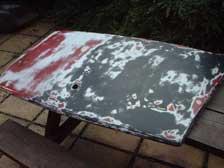
This is the bootlid as it was when I pulled it out of the loft.
To get the shine back after wet sanding, I first used Farecla G3 cutting compound on a wet sponge and then used T-Cut with a polishing mop to bring the shine back. The result is a perfectly smooth glass-like finish! In this shot you can see the depth of the shine; I still have the area around the rear reflector to do here. 1 down, 11 to go!
I applied 8 coats of gloss black paint, and then wet sanded the whole wing down. This shot shows the wing just after the wet sanding process (see the "Painting" section for more on this).

This rear wing is now ready for painting. I've applied a few coats of high-build primer and flatted it back down.
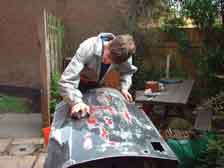
Here I am wet sanding a front door - preperation is everything when painting!
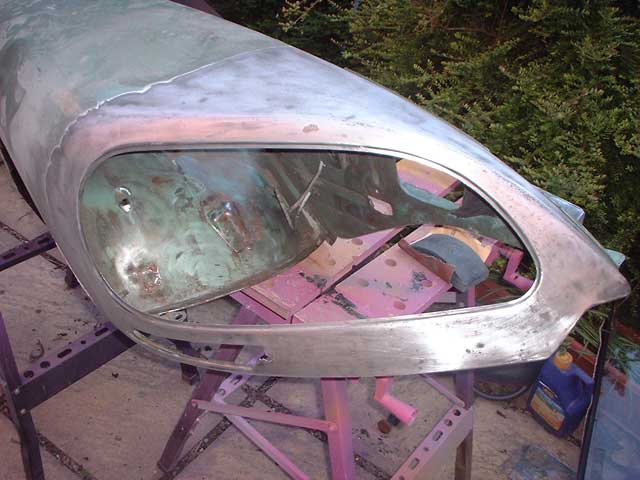
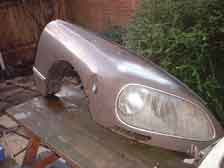
I found a new front wing at Citromobile in Utrecht, but the paint was badly scored and I wasn't sure about the condition of the underlying metal.
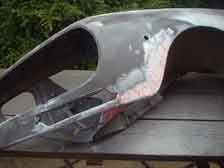
Here I have taken the front end back to bare metal, the rest of the wing will also be taken this far back before being primed and painted.
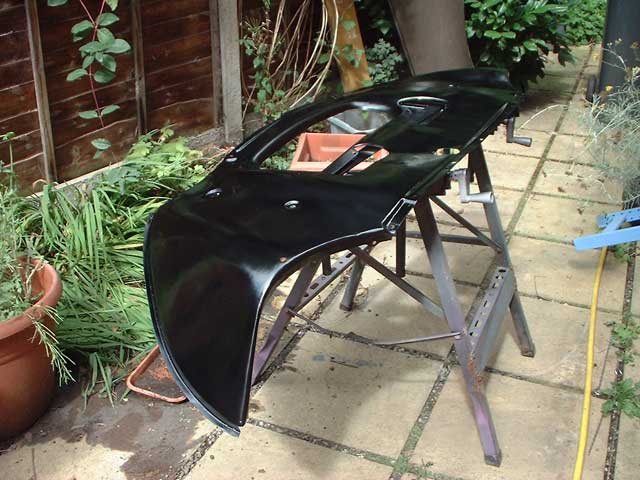
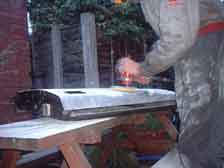
I have almost decided to spray the car myself so I thought I'd better get some practice! I sprayed this rear wing in Black Cellulose to see what sort of finish I could get and how much rubbing down it would take. As you can see, the finish is pretty good straight from the gun and this is on a panel with no priming. I think I should be able to get a good finish, I'll post some pics when I do!

Spraying primer-filler onto a rear wing, March 2003.
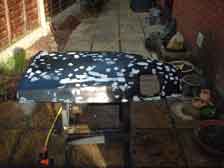
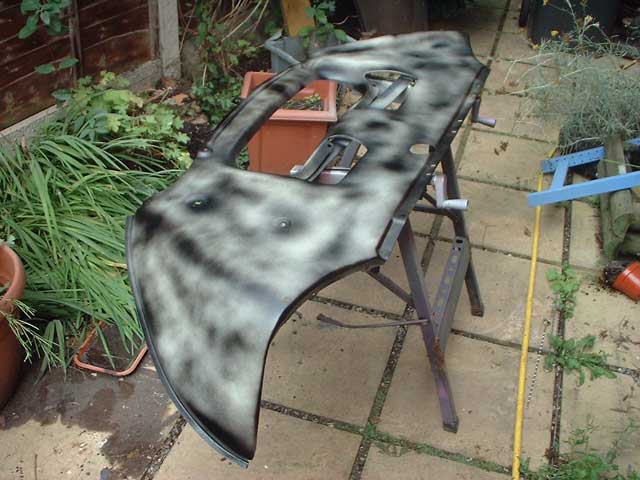
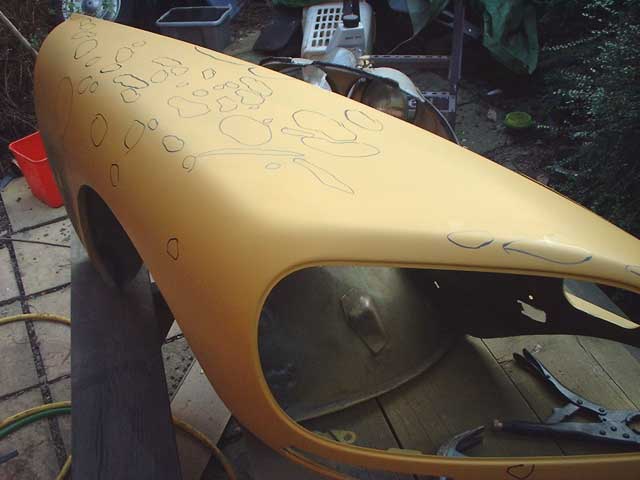
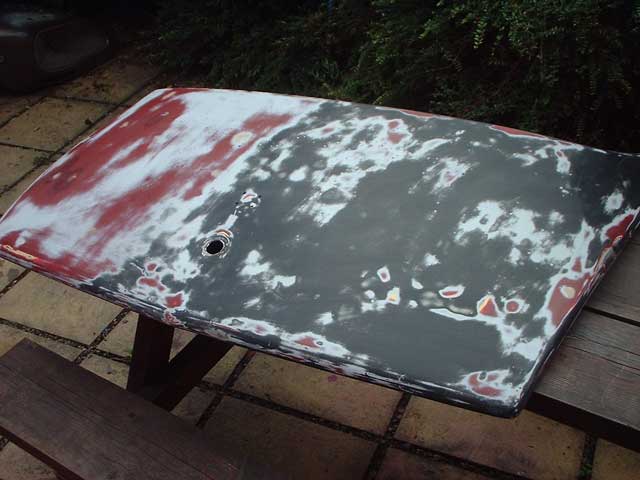
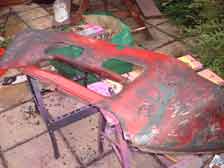
No, I haven't decided to go for a spotty colour scheme!
The marks on this wing are stopper, which is used to fill tiny imperfections in the surface. I went over every millimeter of this wing and stopped anything that looked like it might show through the paint finish.
After the stopper had gone off, I sanded each patch down until the only stopper remaining was a tiny section sitting in the imperfection in the panel.
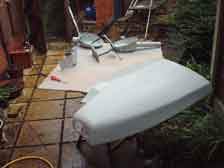
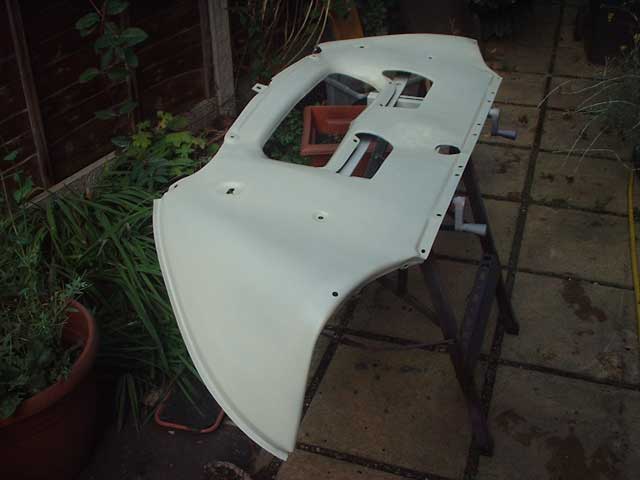
Here I've just primed one of the rear wings using high-build cellulose primer.
I need to use Stopper to fill some small cracks, then apply another couple of coats of primer, followed by the black topcot.

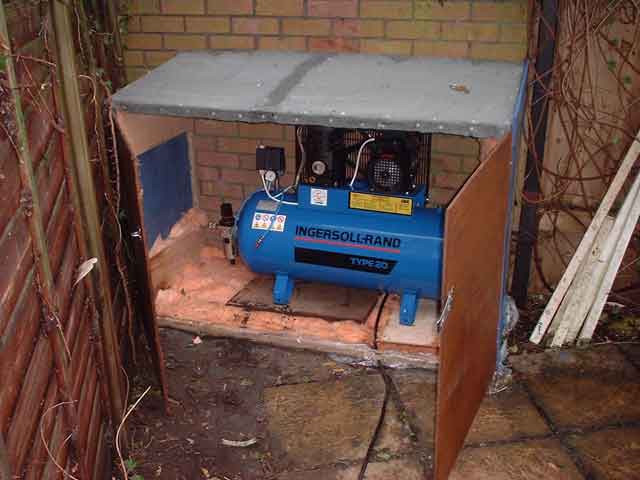
I've finally bought a compressor, so spraying things is now much easier. I've primed a rear wing, which was really easy, much better than using spray cans!
I assembled everything using new nuts and bolts, all of which were first coated with copper grease, to make it easier to pull apart in the future.

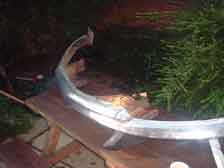
I wire brushed all of the steel and then primed and painted the bits, ready for reassembly.

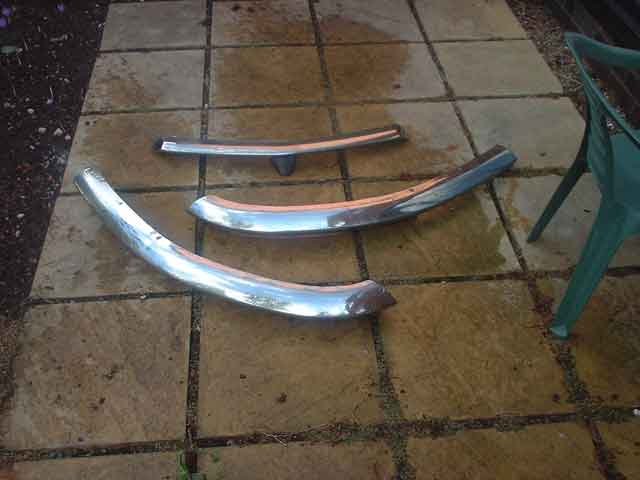
Next, I sorted all of the steelware and chose the best bits from the two bumpers.
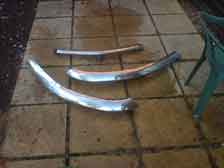
First, I dismantled the new bumper and washed all of the stainless steel.
The bumper that came with my car was badly dented, so I got a replacement from the
Stripathon of 2002.
This however was very rusty, so I decided to make one good one out of the two.

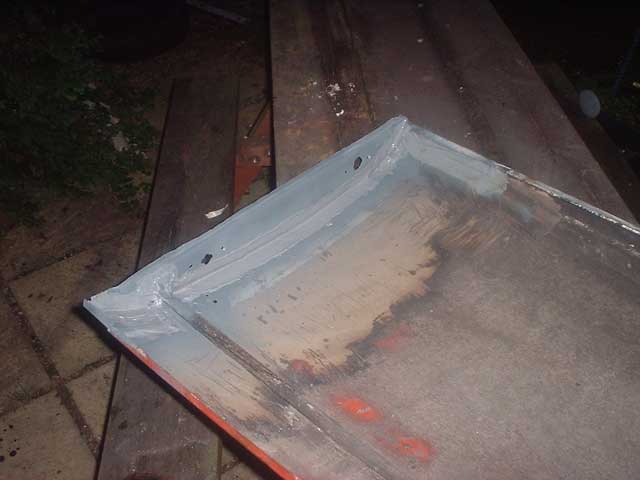
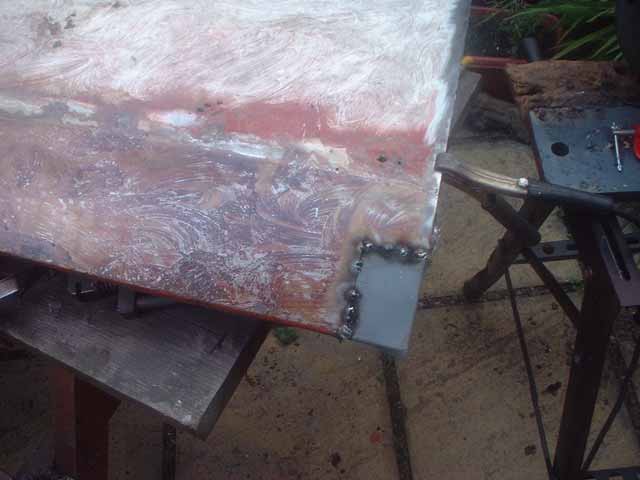
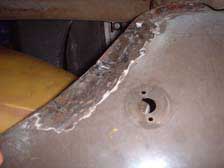
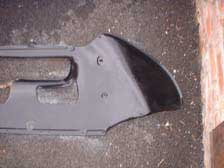
I made the new closing panel out of steel, and welded it to the wing. Once the panel had cooled, it was given another coat of zinc primer and then seam sealed, as you can see here.

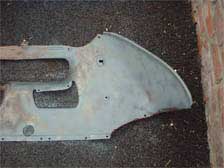
The closing panel of the wing looked in fair condition, though it obviously needed work. I decided that it would be best to remove the end piece, weld in repairs and then weld it back to the panel. However, when I removed it, it became obvious that the panel needed a lot of work, therefore I decided it would be easier to fabricate an entire new panel.

Various repair sections were required on this wing; this is the lower corner with a repair tacked on. In order to minimise the risk of distorting the panel through heat, the repair was welded in tacks, pausing after each one to let the panel cool. Once all of the metal was welded, the tacks were ground away.
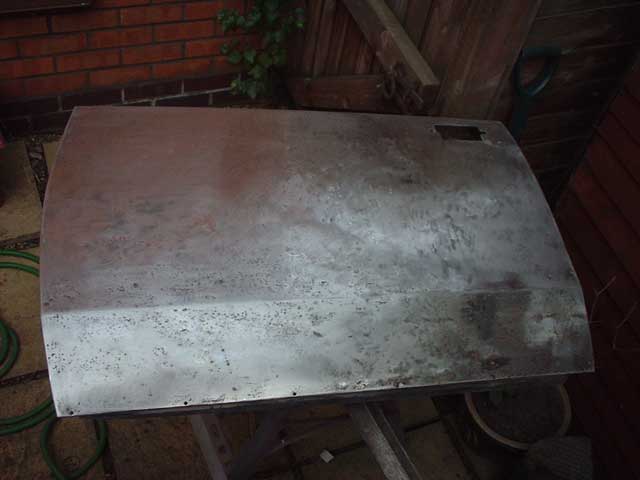
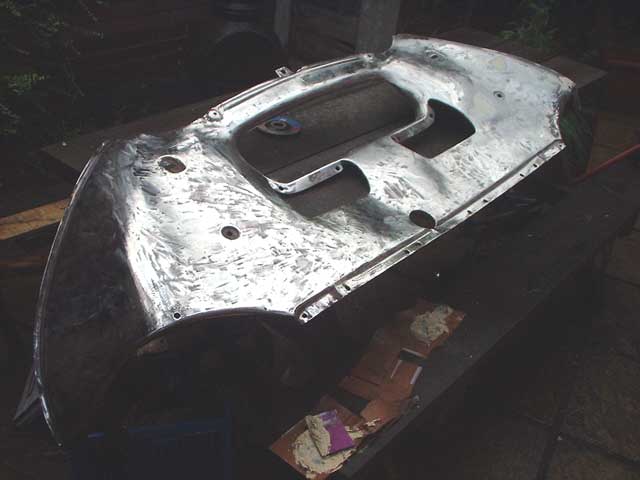
I will be stripping all panels back to bare metal to assess the condition of the underlying metal, and I started on the bottom of this rear wing. I used a wire brush in a grinder, though in hindsight I would have been better getting it sandblasted!!
I'm glad I'm doing this, because even though the paint looked alright, you can see that some surface rust has already formed on the wing. Small areas like this will be wire brushed and treated with rust convertor (I use POR Metal Ready from Frost) before being primed and painted. Larger areas of rot will obviously be replaced with new metal, which is what I've done on the top of this wing.
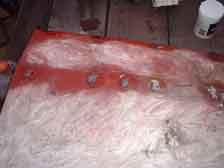
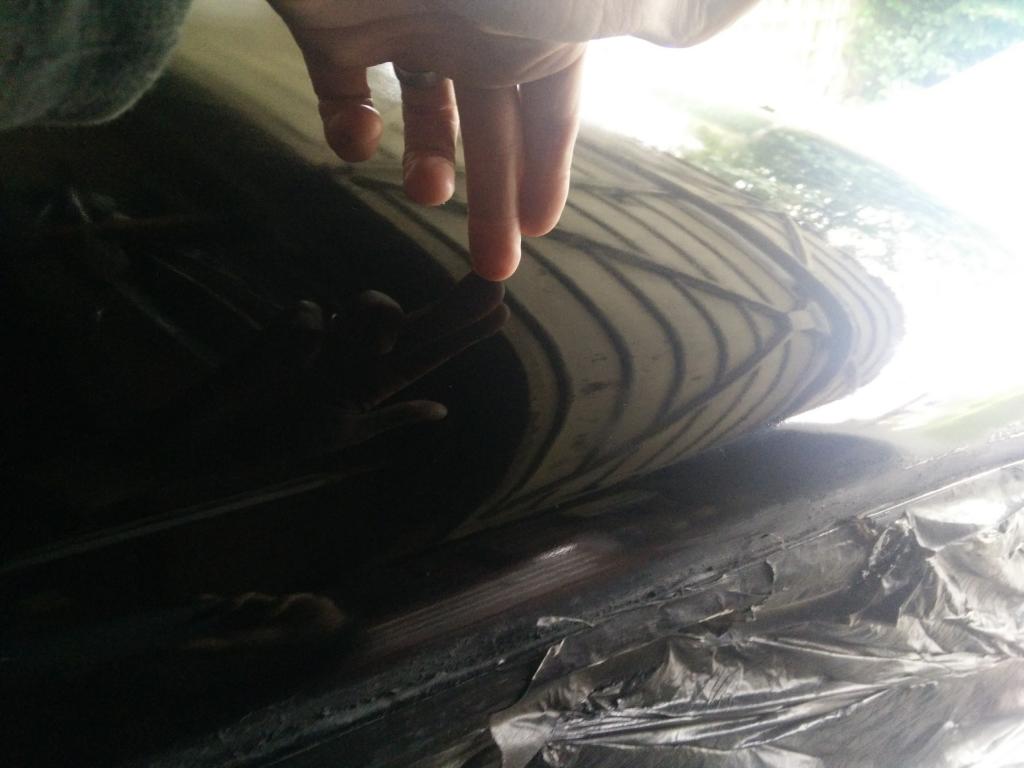
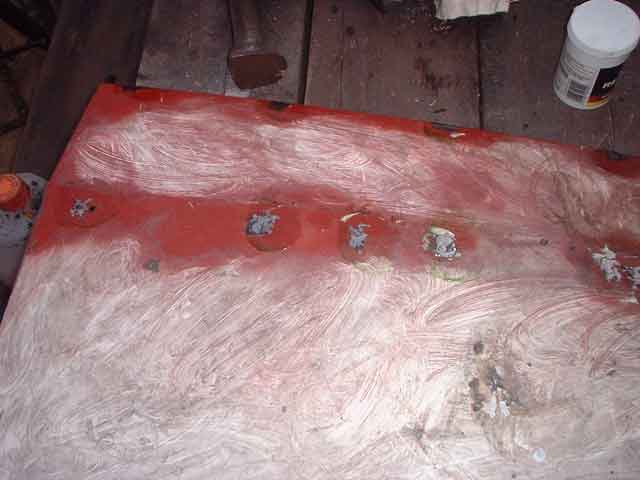
The Pallas cars have stainless steel strips running along the middle, top and bottom of the wings and doors. These are attached by rivets and small platic pegs, which go through holes in the panel. Unfortunately, this is a major spot for rust, and is one reason why Pallas' rust more than normal D's. After speaking to George on the D List, I decided to do what the previous owner of his D had done and weld up all of the holes, except the front and back ones, to reduce the chance of rust behind the trims. The strips will then be attached using very small nuts and bolts, with rubber spacers to keep some air between the panel and the trim.
In this picture you can see that I've welded the holes shut from the rear, and then ground the front smooth. This will be skimmed with filler to give an invisible repair.

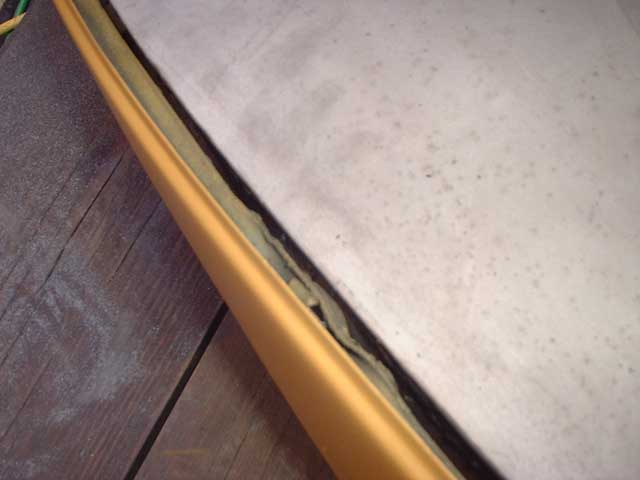
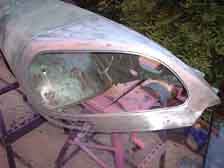
26th June 2002 - got around to putting the windscreen back in today - very nerve wracking. After cleaning the old seal, I dried it and fitted it to the screen, which I had laying on an old duvet on the drive. The seal fitted nicely, so (and against general recommended practice) I put a thin bead of mastic around the seal, in the groove where the glass sits. The seal doesn't need this, but having heard reports of seals leaking due to water pressure from the windscreen wipers, I decided that a little mastic couldn't hurt, it's invisible after all. I then smeared washing up liquid all around the 'outside' of the seal.
With the seal in place I fitted the bottom metal strip to the car loosely, then we lifted the screen onto the car. It was pushed up into the surround and the metal strip postioned correctly. This strip, which holds the glass in place is a right angle section. It is vital that you get the lower half of it under the glass, not in front of it. If you get this wrong, you'll crack the glass when you tighten the clamps.
Once this was secure, I pushed the screen right up into the sections a little at a time, tightening the clamps at each step. I also prised the grey rubber seal around the screen surround sections, and made sure that the stainless trim was in place behind the seal. All that needs to be done now is to fill the gaps between the glass and bulkhead at each end with mastic, which stops fumes entering the cabin from the engine. Phew!

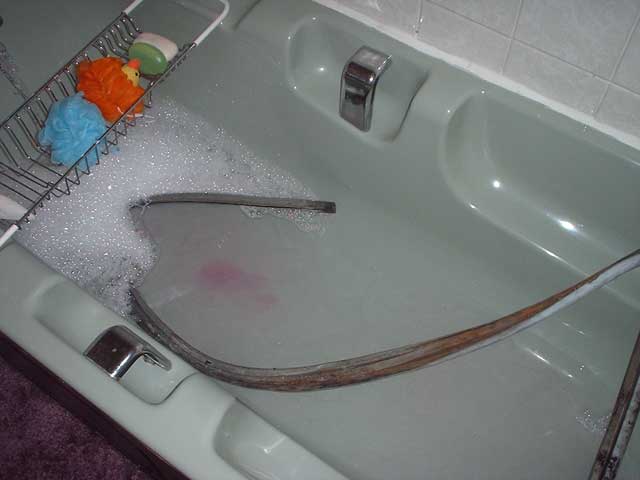
I had planned on buying a new windscreen seal to replace the old one, which was very dirty. However, I spoke to Dennis from Centreville about it, and he said that they clean up well in the bath. So, I put it in the bath! After much scrubbing with soap, wet and dry and a scotchpad, it came up really well. The only niggle is that the inner face is now a different shade of grey to the outer face, due to sun bleaching. I can live with this though, so the screen is going back in tonight. I've repainted the metal strip from the bottom of the screen and cleaned this rubber as well.

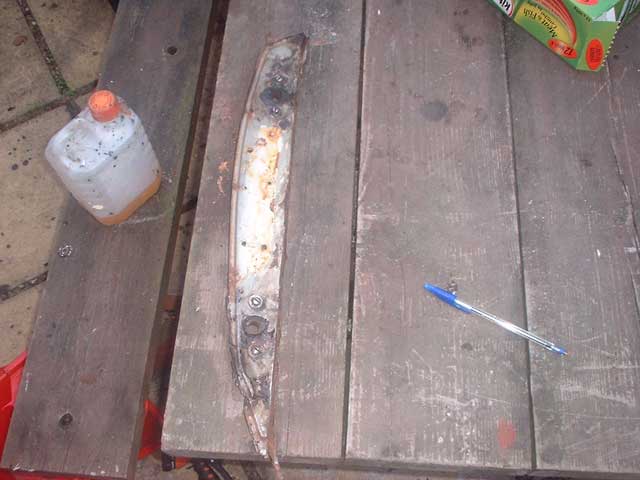
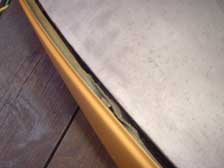
This is the bottom of the rear door, having been welded. I still have to attach a new rubber seal grip, which I'll do soon.
This is the lower edge of the wing, which is all new metal, starting from the 'line' in the panel. I've filled this and again marked the areas needing attention.
Here is the same area after the first coat of filler. The filler is used here to smooth any ripples and low spots in the panel, not for the typical bodge of covering rust.
I've marked out areas that need attention, such as high spots, which will need to be beaten down and then filled, to get a perfectly flat surface.
The lower front edge of the front wing has all been replaced with new metal, as shown here. The new section starts at the far left hand edge of the indicator aperture, and goes pretty much all of the way around the lower half of the wing.
The wheelarch was rotten around it's edge, so I made up some repair sectins and let them in. Here I have let in two repairs, and ground half of the welds down. I will finish grinding the welds back and then skim with filler to make the repair invisible.
You can also see the hole for the Italian market side-repeater in this photo.

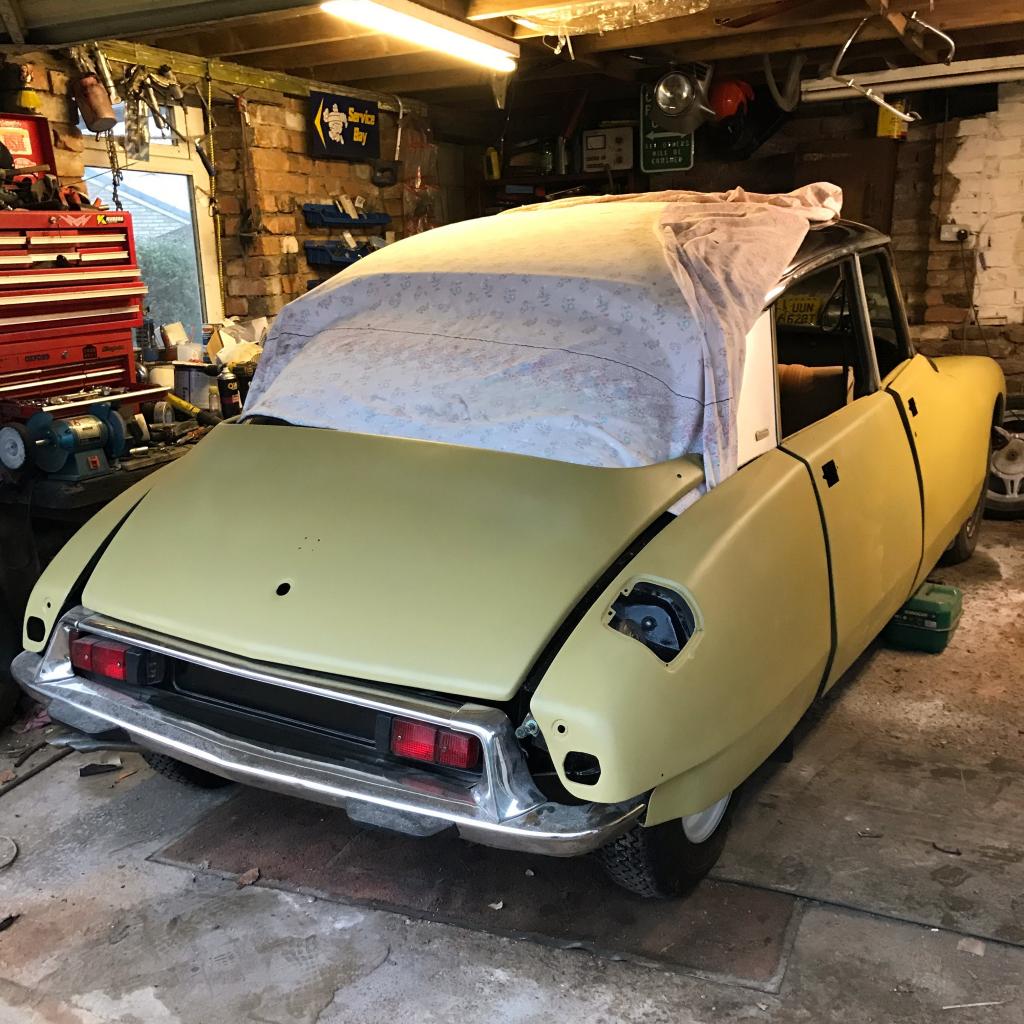
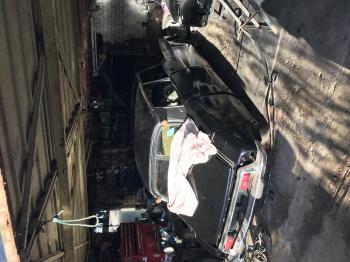
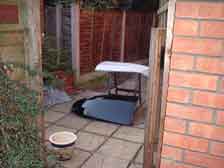
The car is finally in it's new home. This garage is even smaller than the last one, but it's brand new, so it's dry and I've fitted it out how I want it, with light and power. Also, now that the car is movable, I can shove it out to get more space.
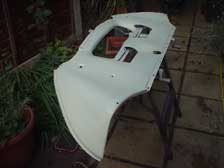
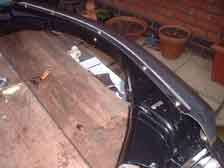
I put some of the panels back on to move them, but I've since removed all panels, including the bonnet.

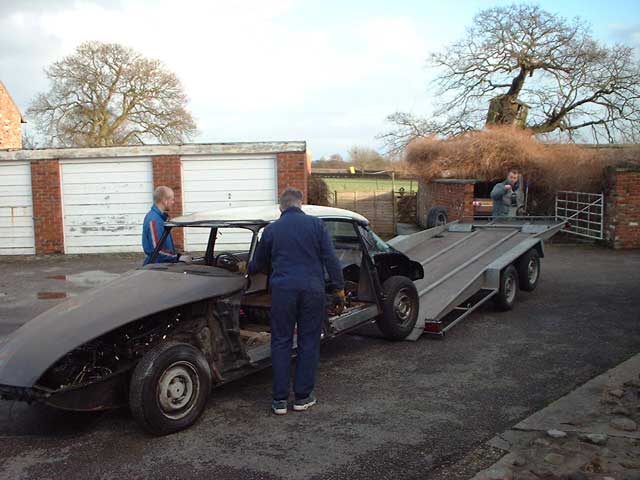
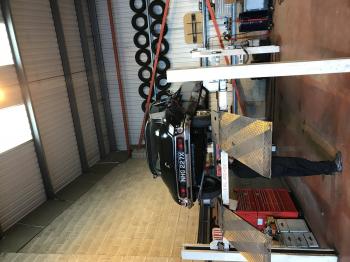
Ian and my Dad guide the car onto the flatbed, whilst my friend Paul winches her up. I took photos :-)
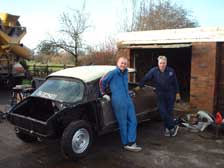
My Dad and friend Ian came over to help me move it, and I'm glad they did! We rigged the steering crudely back up and I used lengths of dowel in the suspension cylinders to keep the suspension up. (Those on the DSeries list will know what I'm talking about ;-))
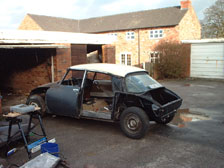
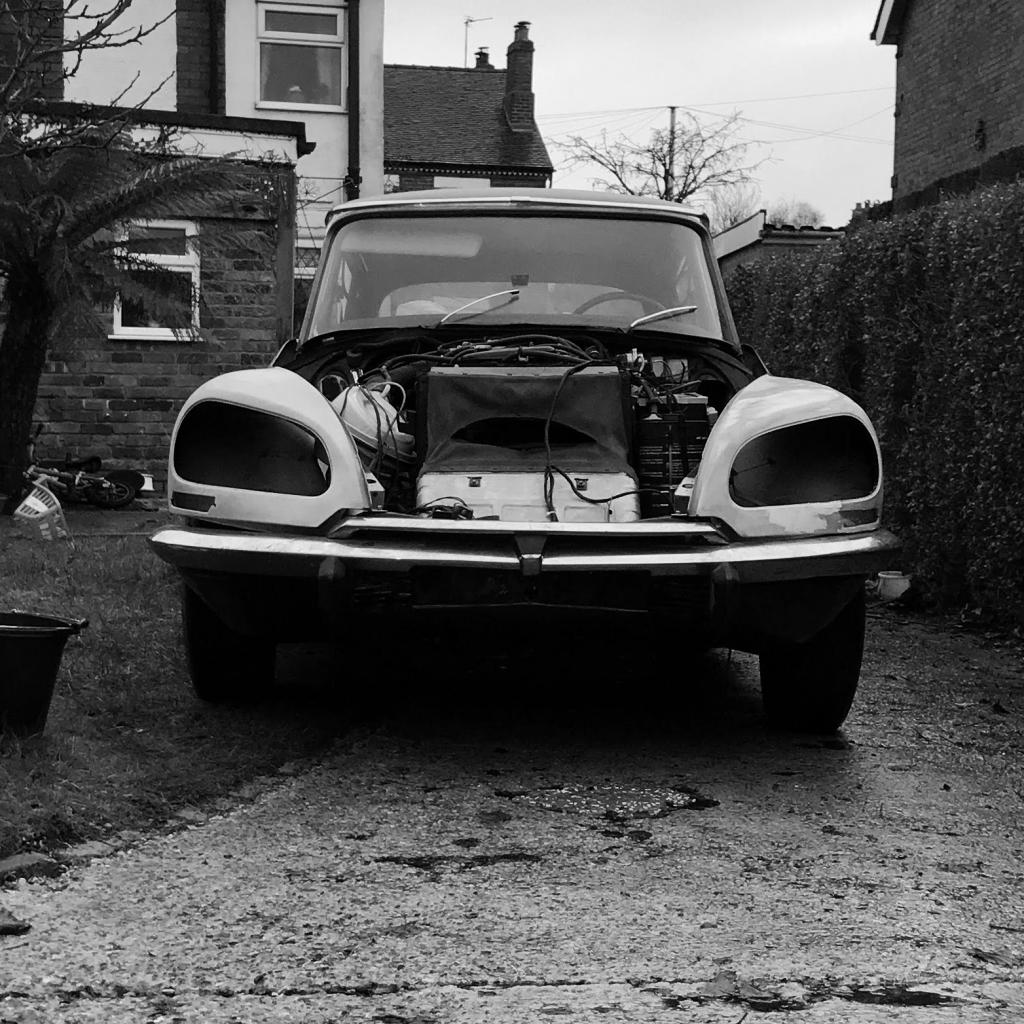
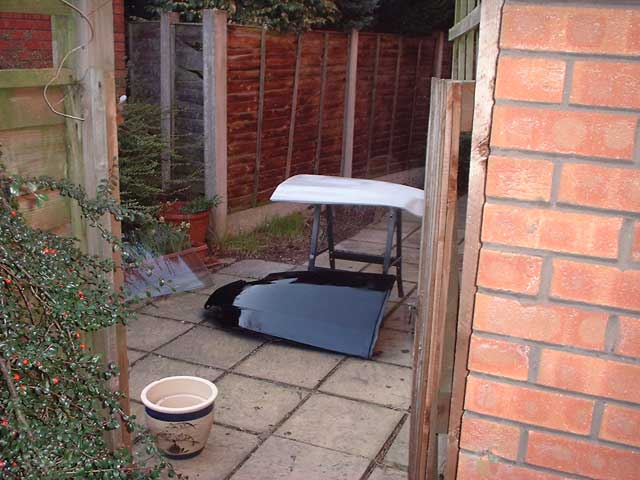
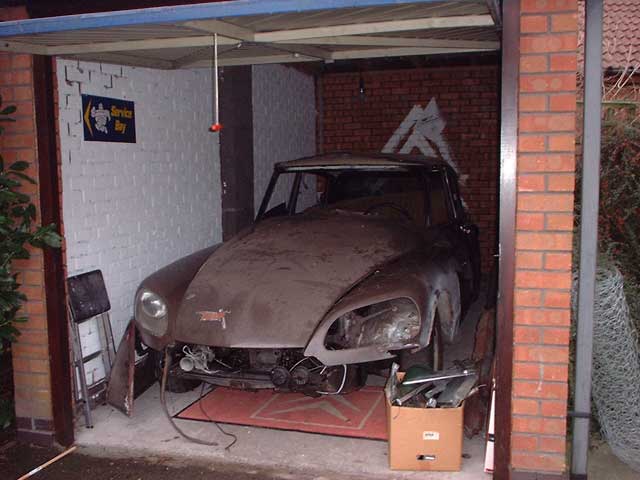
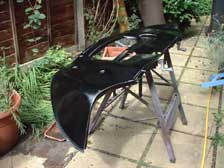
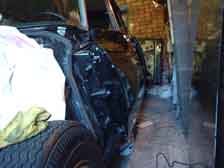
The DS finally comes out of the horrible wet garage, for the first time in over a year. I can see the progress, but then I know where to look!
20th January 2002 - I've now moved house so the D has got a nice new clean, dry garage! It's still languishing in the old garage at the moment, but I'm moving it to it's new home next weekend.
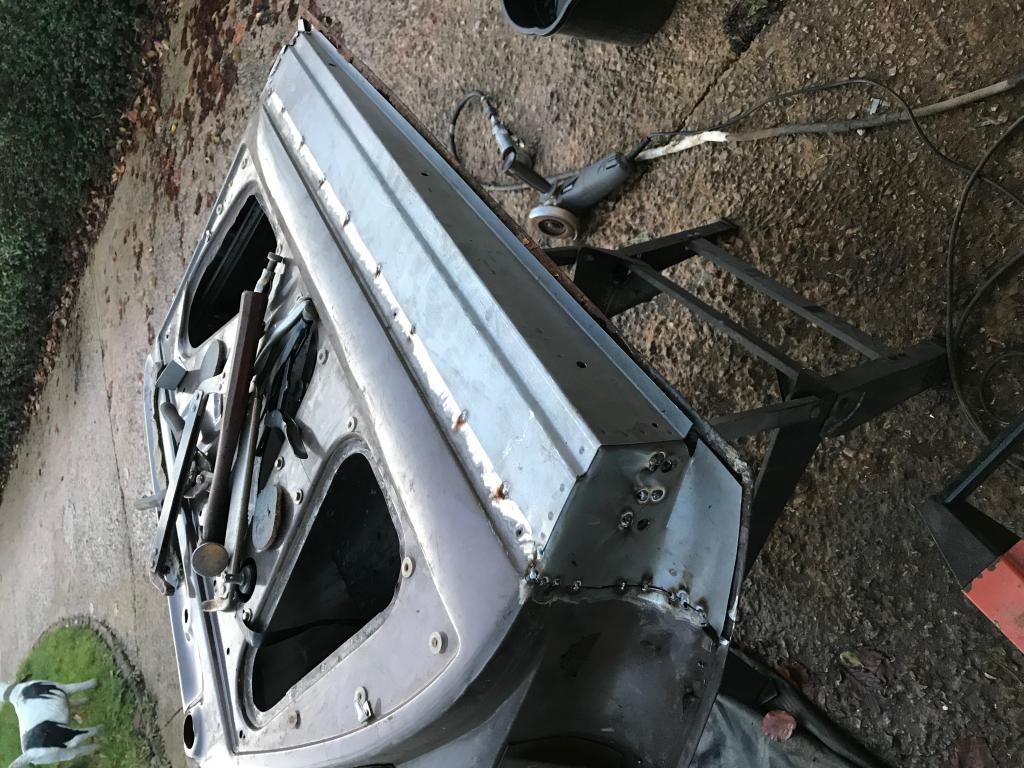
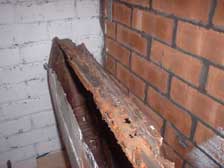
I began repairing the new rear door I bought last year - it needs a whole new bottom section. I've cut the lower 6 inches of the front skin away and made a new lower half, which I'll fit after I've replaced the inner bottom. Even though I thought the door was reasonably sound, it proved to be very rotten - which just proves that no matter how good a DS looks, you have to examine it really carefully to check it.
In the photo you can see the bottom edge of the door, with some of the outer skin cut away. The repair panels will have to cover the inner few inches and the 6 inches at the outer skin.
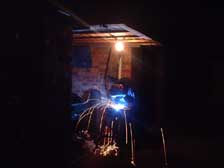
Hard at work welding in the cold British winter....
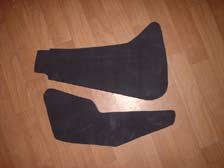
I bought some rubber material from the Classic Car Show at the NEC and made up some new mudflaps for the rear panel. I was very pleased with the result, as the material is very similar to the original. I'm not too sure about the shape though as I only had the old torn ones to go by!
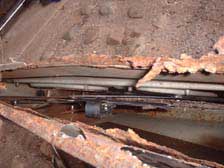
26th July 2001 - I finally got round to removing the front screen today. It's held in place by a long metal re-enforced rubber strip along the lower edge, which is held in place by three clamps like the one pictured here. The screen came out very easily, I removed the clamps, pulled the rubber strip away and then pushed the screen forward fron the inside of the car. It dropped down slightly and I could then manouevre it out through the screen aperture.
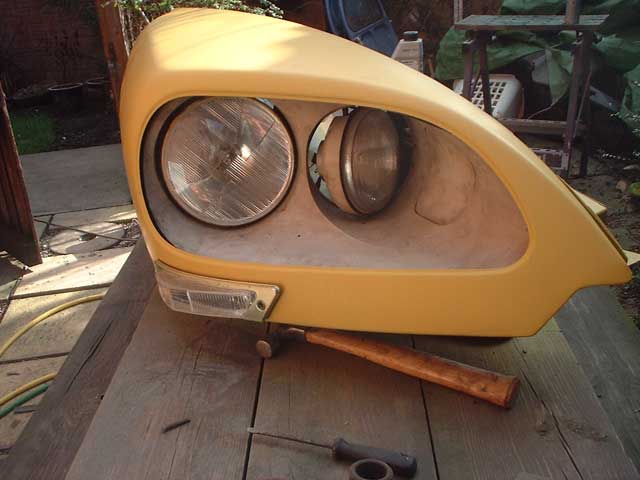
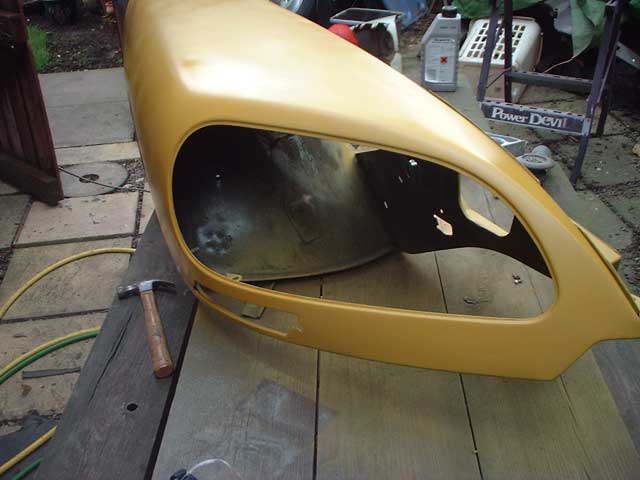
Here you can(t) see the drivers door bottom - because it had rusted completely away! I found that someone had 'repaired' the door bottom by riveting a sheet of steel to it then grinding the rivet heads off and painting over the top...this photo shows the results! Instead of attemping to repair this door, which had similar bodges elsewhere I bought a good secondhand door, which has very little rust.
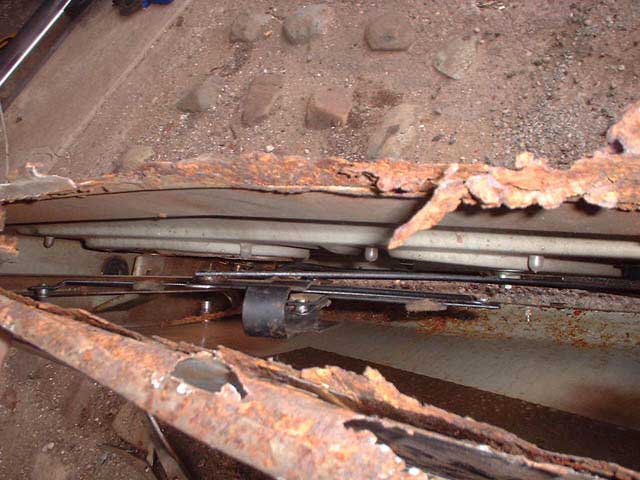
This picture also shows the (bloody) clip which holds the window glass in place - it is very difficult to prize apart enough to pull the glass out. I ended up putting my hand up through the bottom of this door to remove my beloved tinted glass from it - I struggled for hours with the other doors! Not looking forward to putting the glass back....
Because the inner valence can't be seen, I painted it using Black coach paint, applied with a brush. This gives a much harder surface and resists corrosion better than ordinary cellulose paint. I will obviously paint the outer side of the valence with cellulose in the normal way - the outer valence should be the same color as the bodywork on later Deese's.
Even though the POR rust remover etch and zinc primes the metal as well as removing the rust, I decided to use some spray on zinc primer, to make sure that it doesn't rot again. This is after the first coat.
The front valence was rotten at the edges on my car, so I found another one. This is the new one after removing the worst of the surface rust with POR Rust remover.
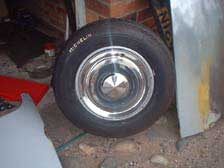
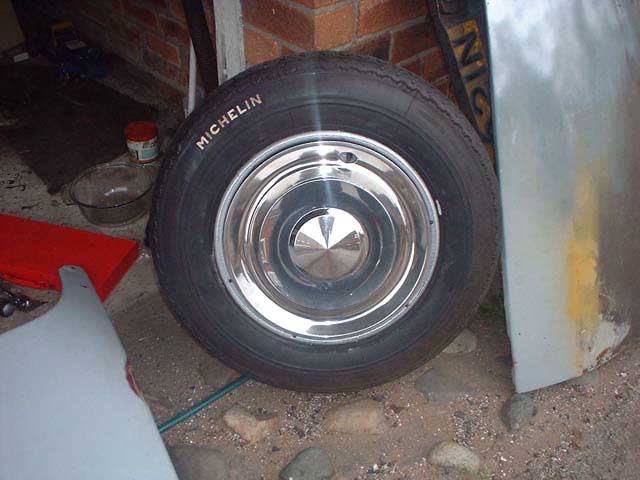
I have just wire brushed and repainted this wheel in Citroen Pearl Grey metallic. I also filled the Michelin lettering in on the tyre, which I believe was done on the earlier Deese's. I fitted the cleaned hubcap to give an impression of what it will look like on the car! The tyre is a new Michelin XAS, the standard fitting on the Deese.